Making of: the piano room
Table of contents
Jump in this page to: armchairs, piano. macramé, flowers or other objects.
The 3D models
Download the 3D objects from this project (ZIP file, 71 mb)
 From the beginning I wanted to have all objects at the right proportions. As such, almost all, if not really all the
objects, were measured in real life for the precise dimensions: armchairs, piano, table, doors, etc. Furthermore, to
add real precision, I also measured them in sections, as such that I also capture the right proportions between the
subcomponents of the objects. For example: the piano feet length, diameter, the width and height of the front side,
then the back side, also the piano keys, armchair's seat, back and arm sections, the height between the ground and
the covers, etc.
From the beginning I wanted to have all objects at the right proportions. As such, almost all, if not really all the
objects, were measured in real life for the precise dimensions: armchairs, piano, table, doors, etc. Furthermore, to
add real precision, I also measured them in sections, as such that I also capture the right proportions between the
subcomponents of the objects. For example: the piano feet length, diameter, the width and height of the front side,
then the back side, also the piano keys, armchair's seat, back and arm sections, the height between the ground and
the covers, etc.
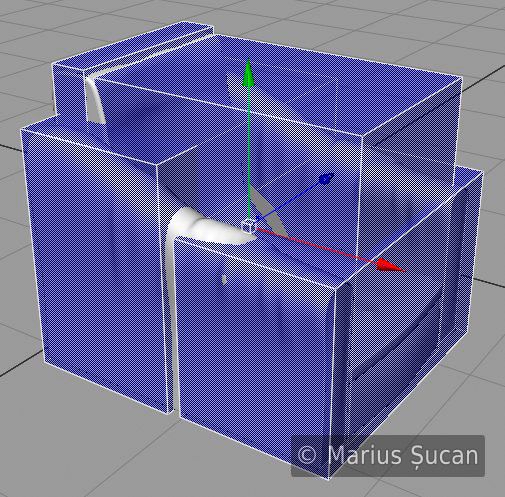
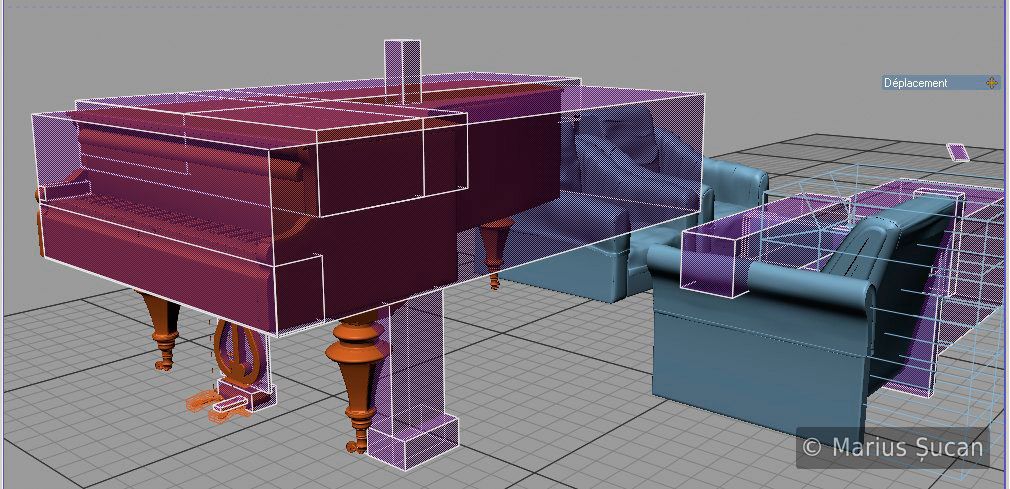
In Cinema 4D I created cubes with the respective dimensions encompassing each object or section of an object. I named these guide-cubes the maquettes, but the term does not necessarily fit.
Armchairs
The armchairs were among the first objects I modeled.
I used Loft nurbs and splines to define the base shape for the arms. For the caps, I used the semi-circle beveling. After completing the base arm, I turned the mesh into an editable and I created the brown cover, by duplicating the initial object. The creases were done in polygonal mode, by overlapping polygons offsetting. This must be done taking into account how the Hyper-nurbs function subdivides the mesh so that it turns out nicely. No sculpting tools were used, nor SPD. I also used the simple brush tool from C4D to "smear" a bit the surface of the cover, to make it more random, more natural. The pictures below emphasize the differences between the initial state and the final version of these objects.
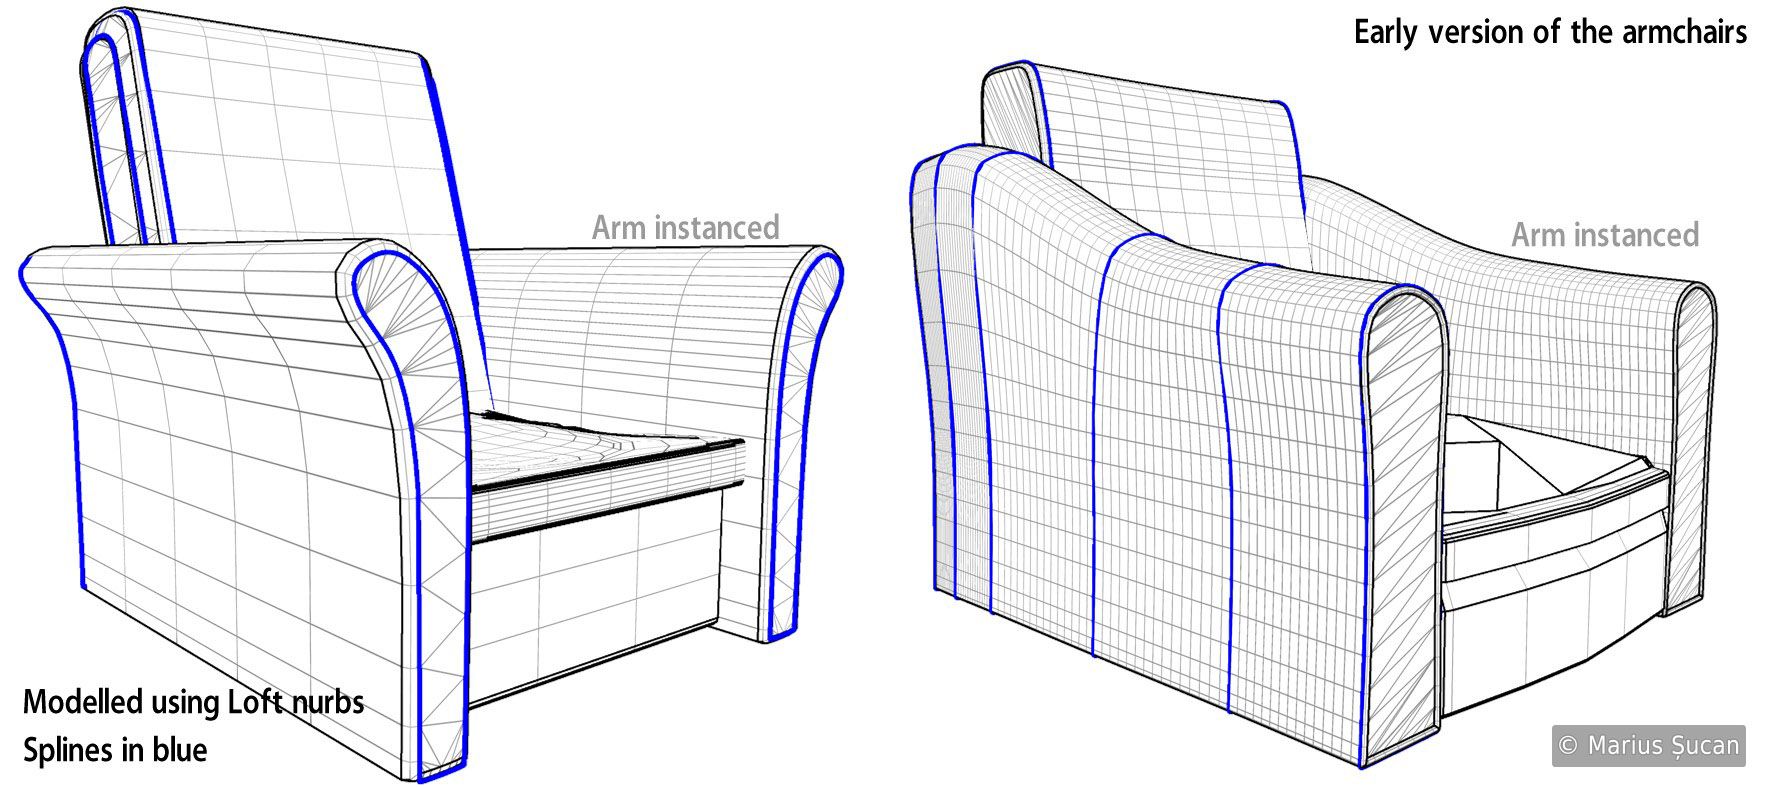
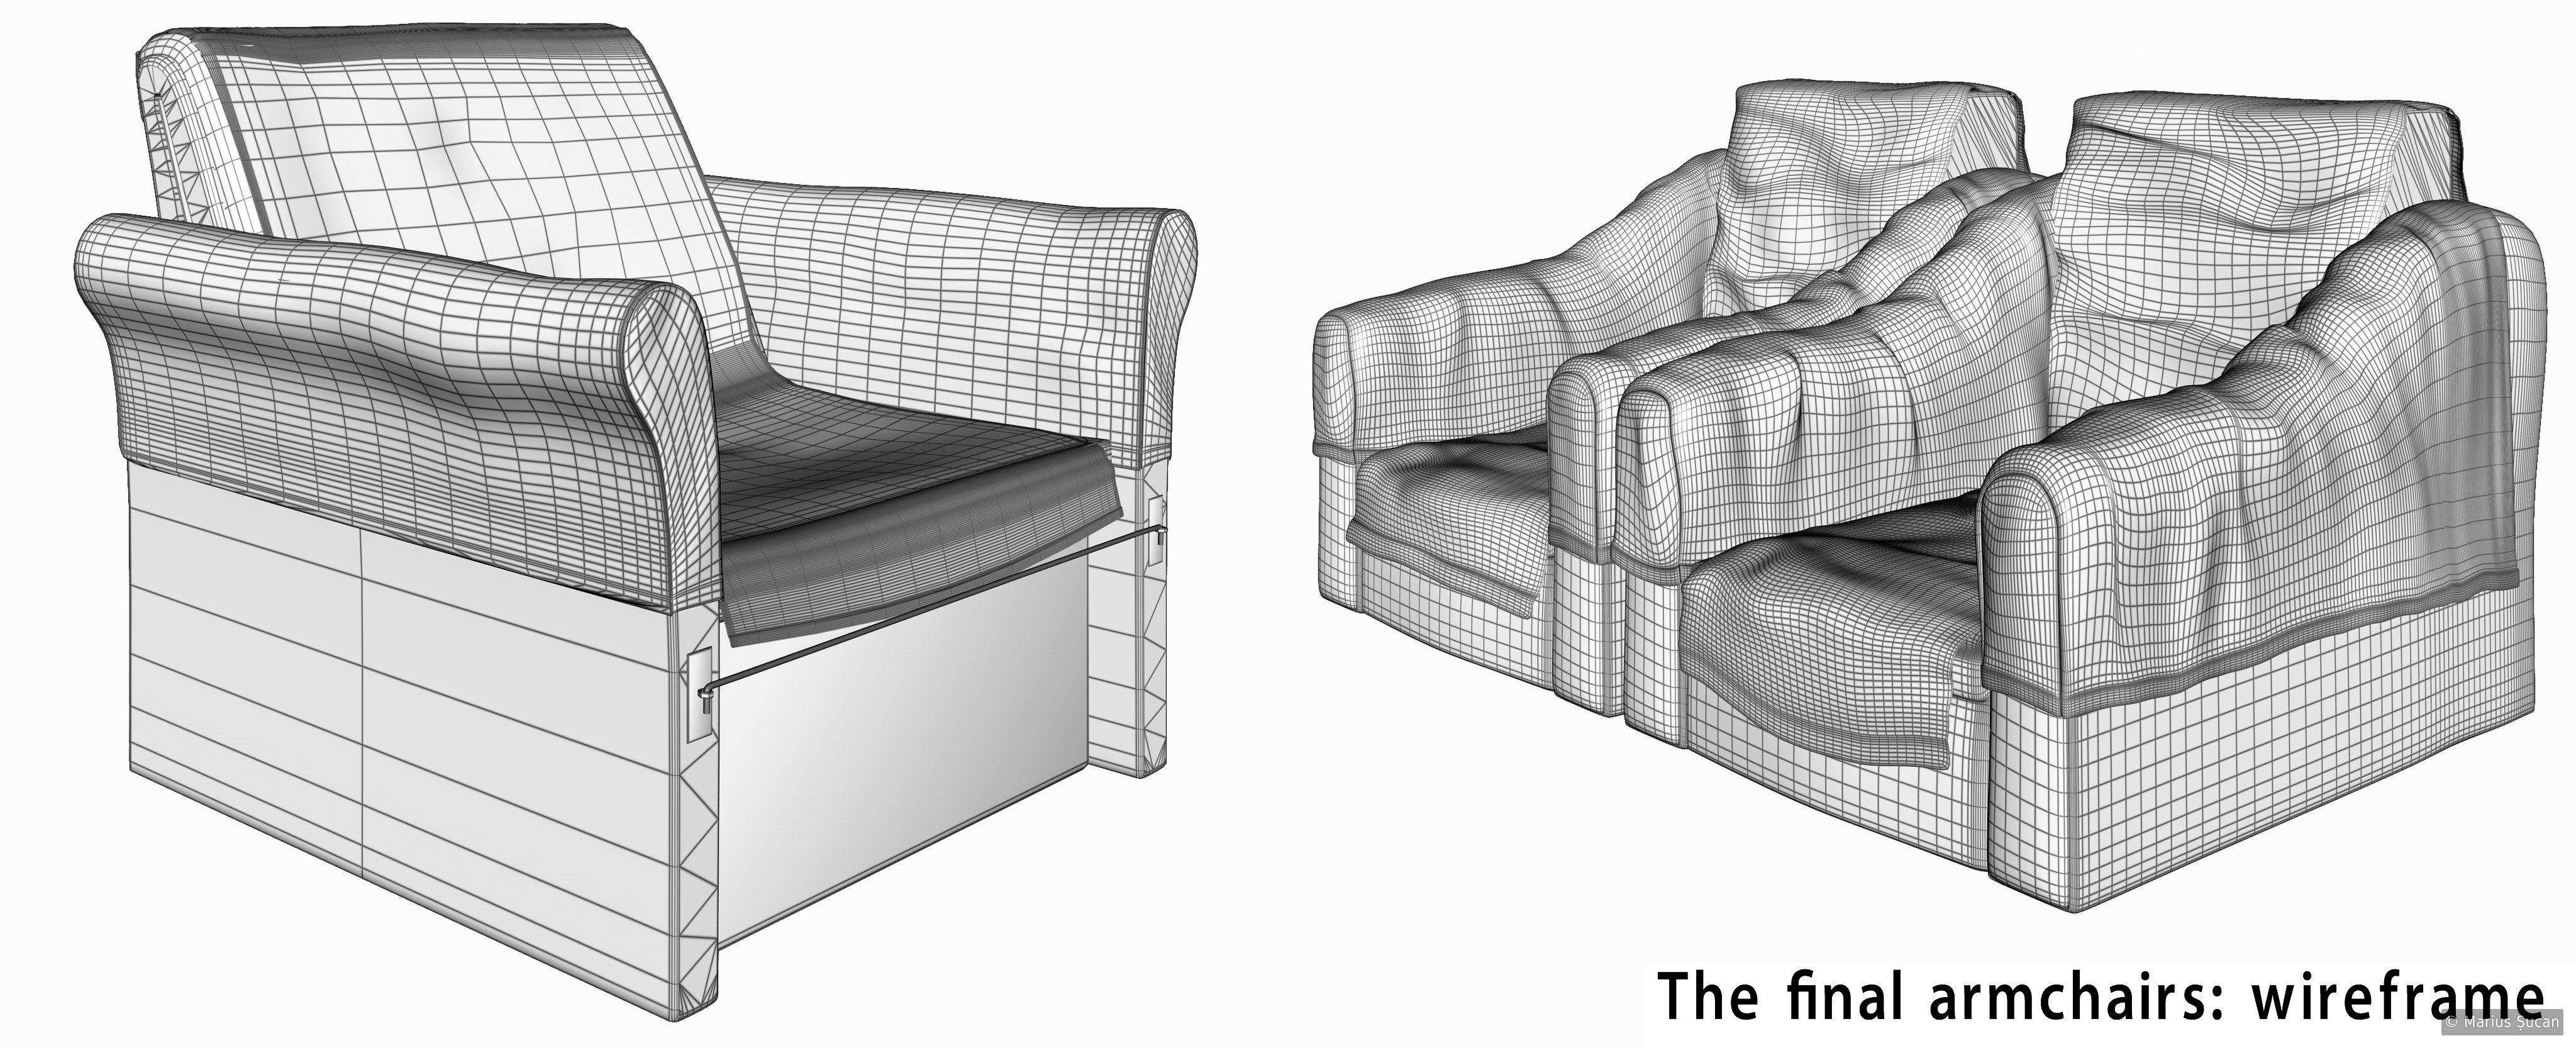

The seats of the armchairs were made from cubes with a moderate amount of polygons. After turning them into editable meshes I used various tools to get to the end result. The one piece brown cover was done using Loft nurbs again with a non-closed spline. This one as well, was turned into an editable mesh to make it look more natural using the brush tool: smearing, pinching and offsetting different regions.
Piano
Initially, when I started the project, the piano seemed as a very hard task, but it was actually quite simple. It did require for me, back then, two years ago, quite a bit of trouble to get it right.
The piano corpus was modeled using the box modeling technique. I started from a cube and then got to what we can see in the images below. The top sliding component is just a simple extruded spline.
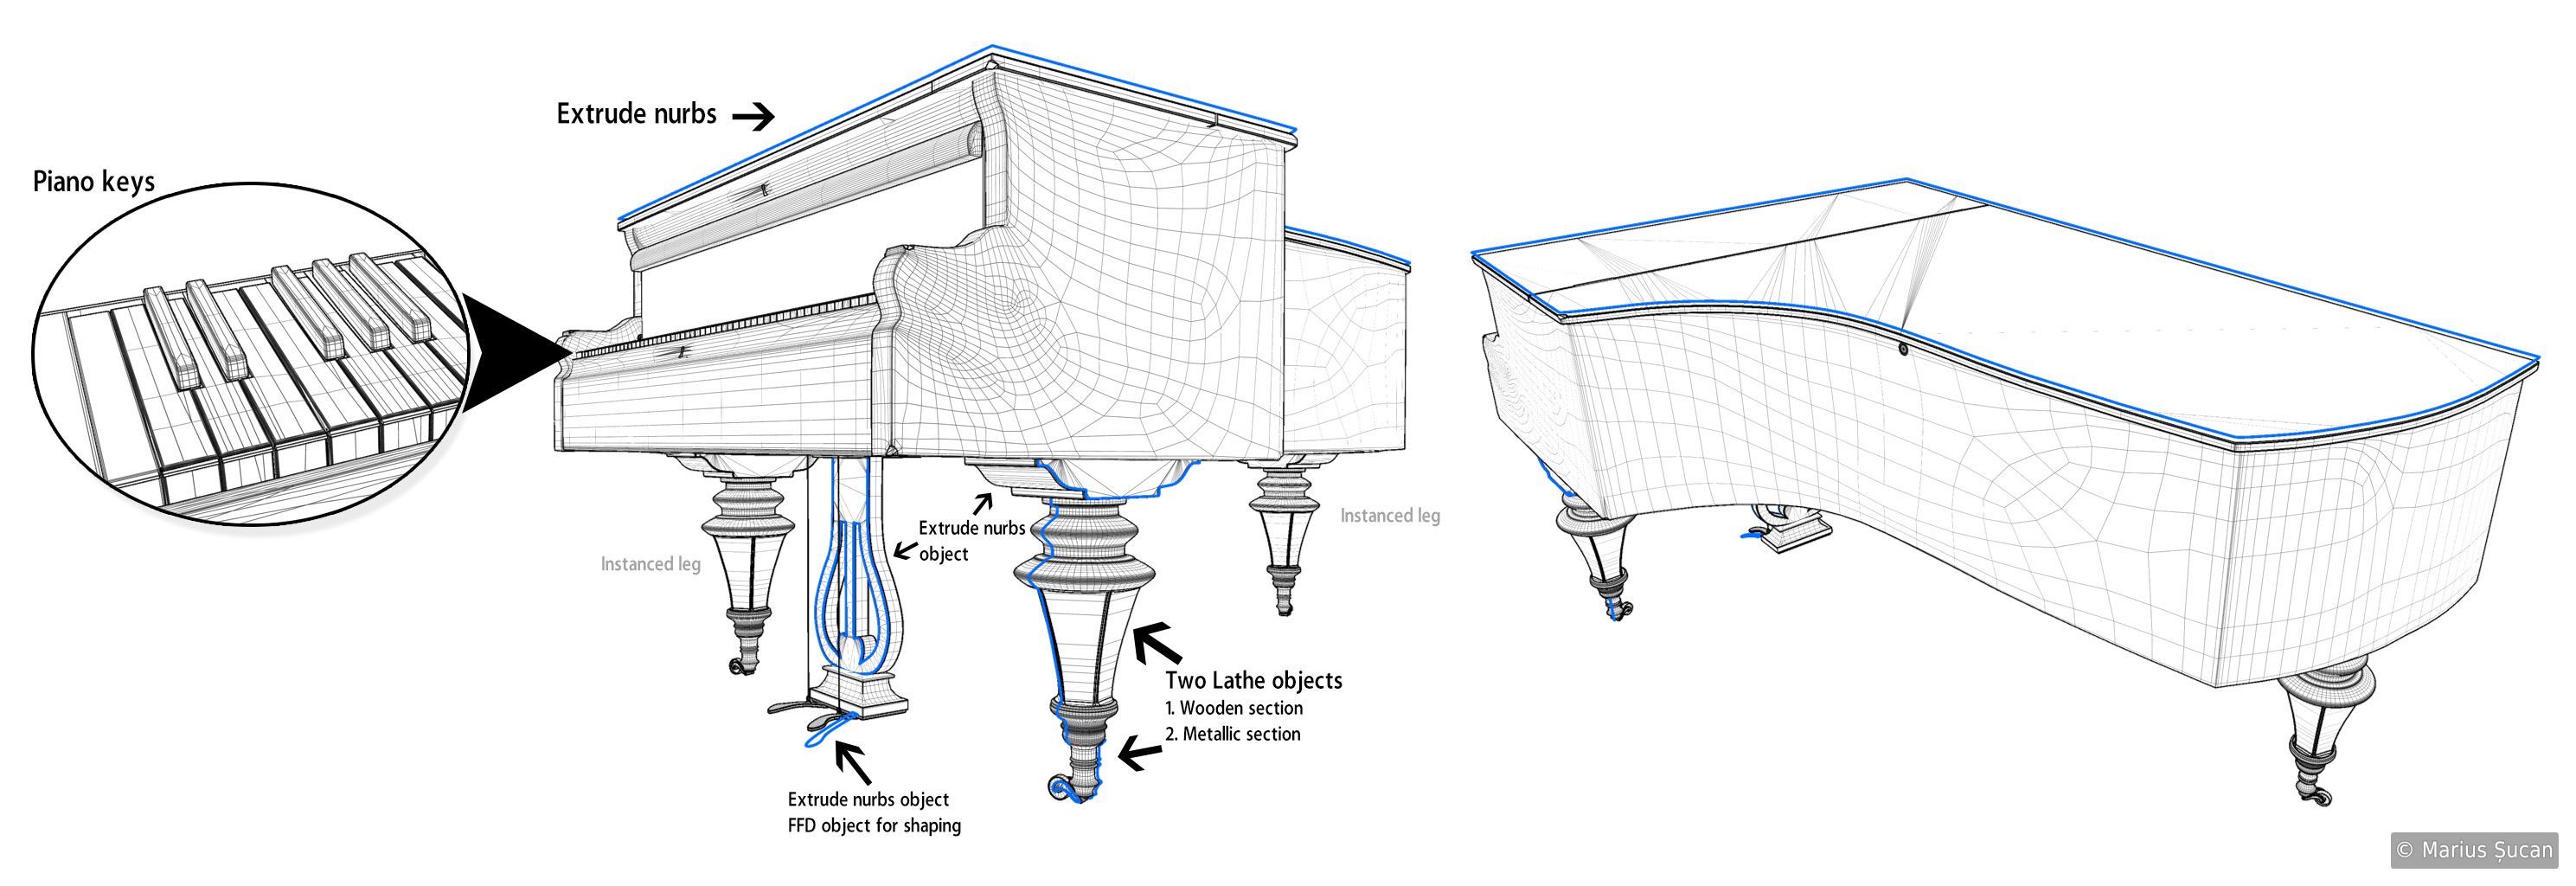 Basically, for the legs of the piano, I used the Lathe nurbs object to shape them. But, because the entire shape of
the leg is complex, I decided to use multiple objects to model it. As such, it has the following sections: the upper
section, the middle section, which is a Lathe object with just a few polygons to make it look like in the image, and
the last section is the metallic one.
Basically, for the legs of the piano, I used the Lathe nurbs object to shape them. But, because the entire shape of
the leg is complex, I decided to use multiple objects to model it. As such, it has the following sections: the upper
section, the middle section, which is a Lathe object with just a few polygons to make it look like in the image, and
the last section is the metallic one.
The design of the pedal rod, below the piano, was done with an extrude nurbs object applied onto a carefully designed spline based on the real life one.
Box modeling was again the technique used for the piano keys. I created the different shapes of the keys and then, I used the instance object to distribute them.
Macramé
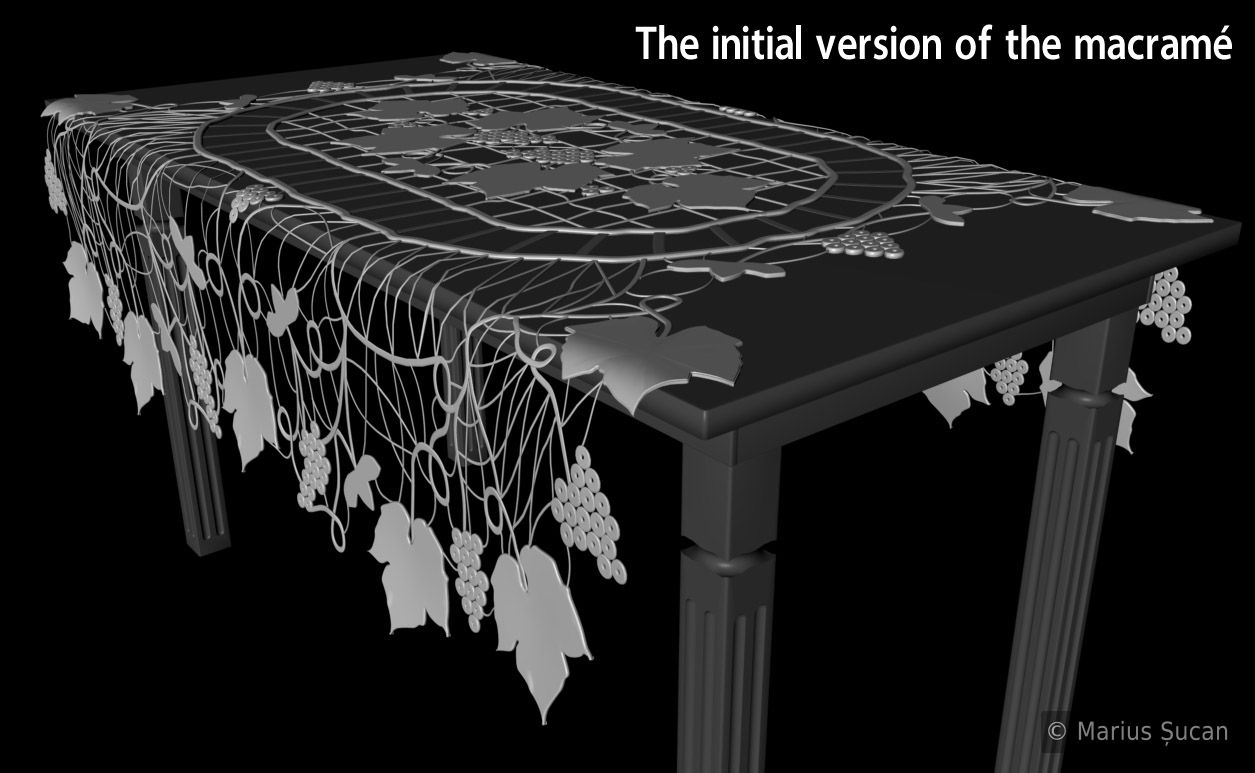
If I could name the most complex object in the scene, it's definitely the macramé, the white table cloth with leaves. It was a real hurdle to make it, but it was worth it.
 I recreated the real model in 3D, by tracing splines in C4D. The splines were
used for the rather complex net which is connecting and holding together the whole design of the table cloth. I
used multiple Sweep nurbs objects to add thickness to the splines, accordingly to the real model. By noticing the
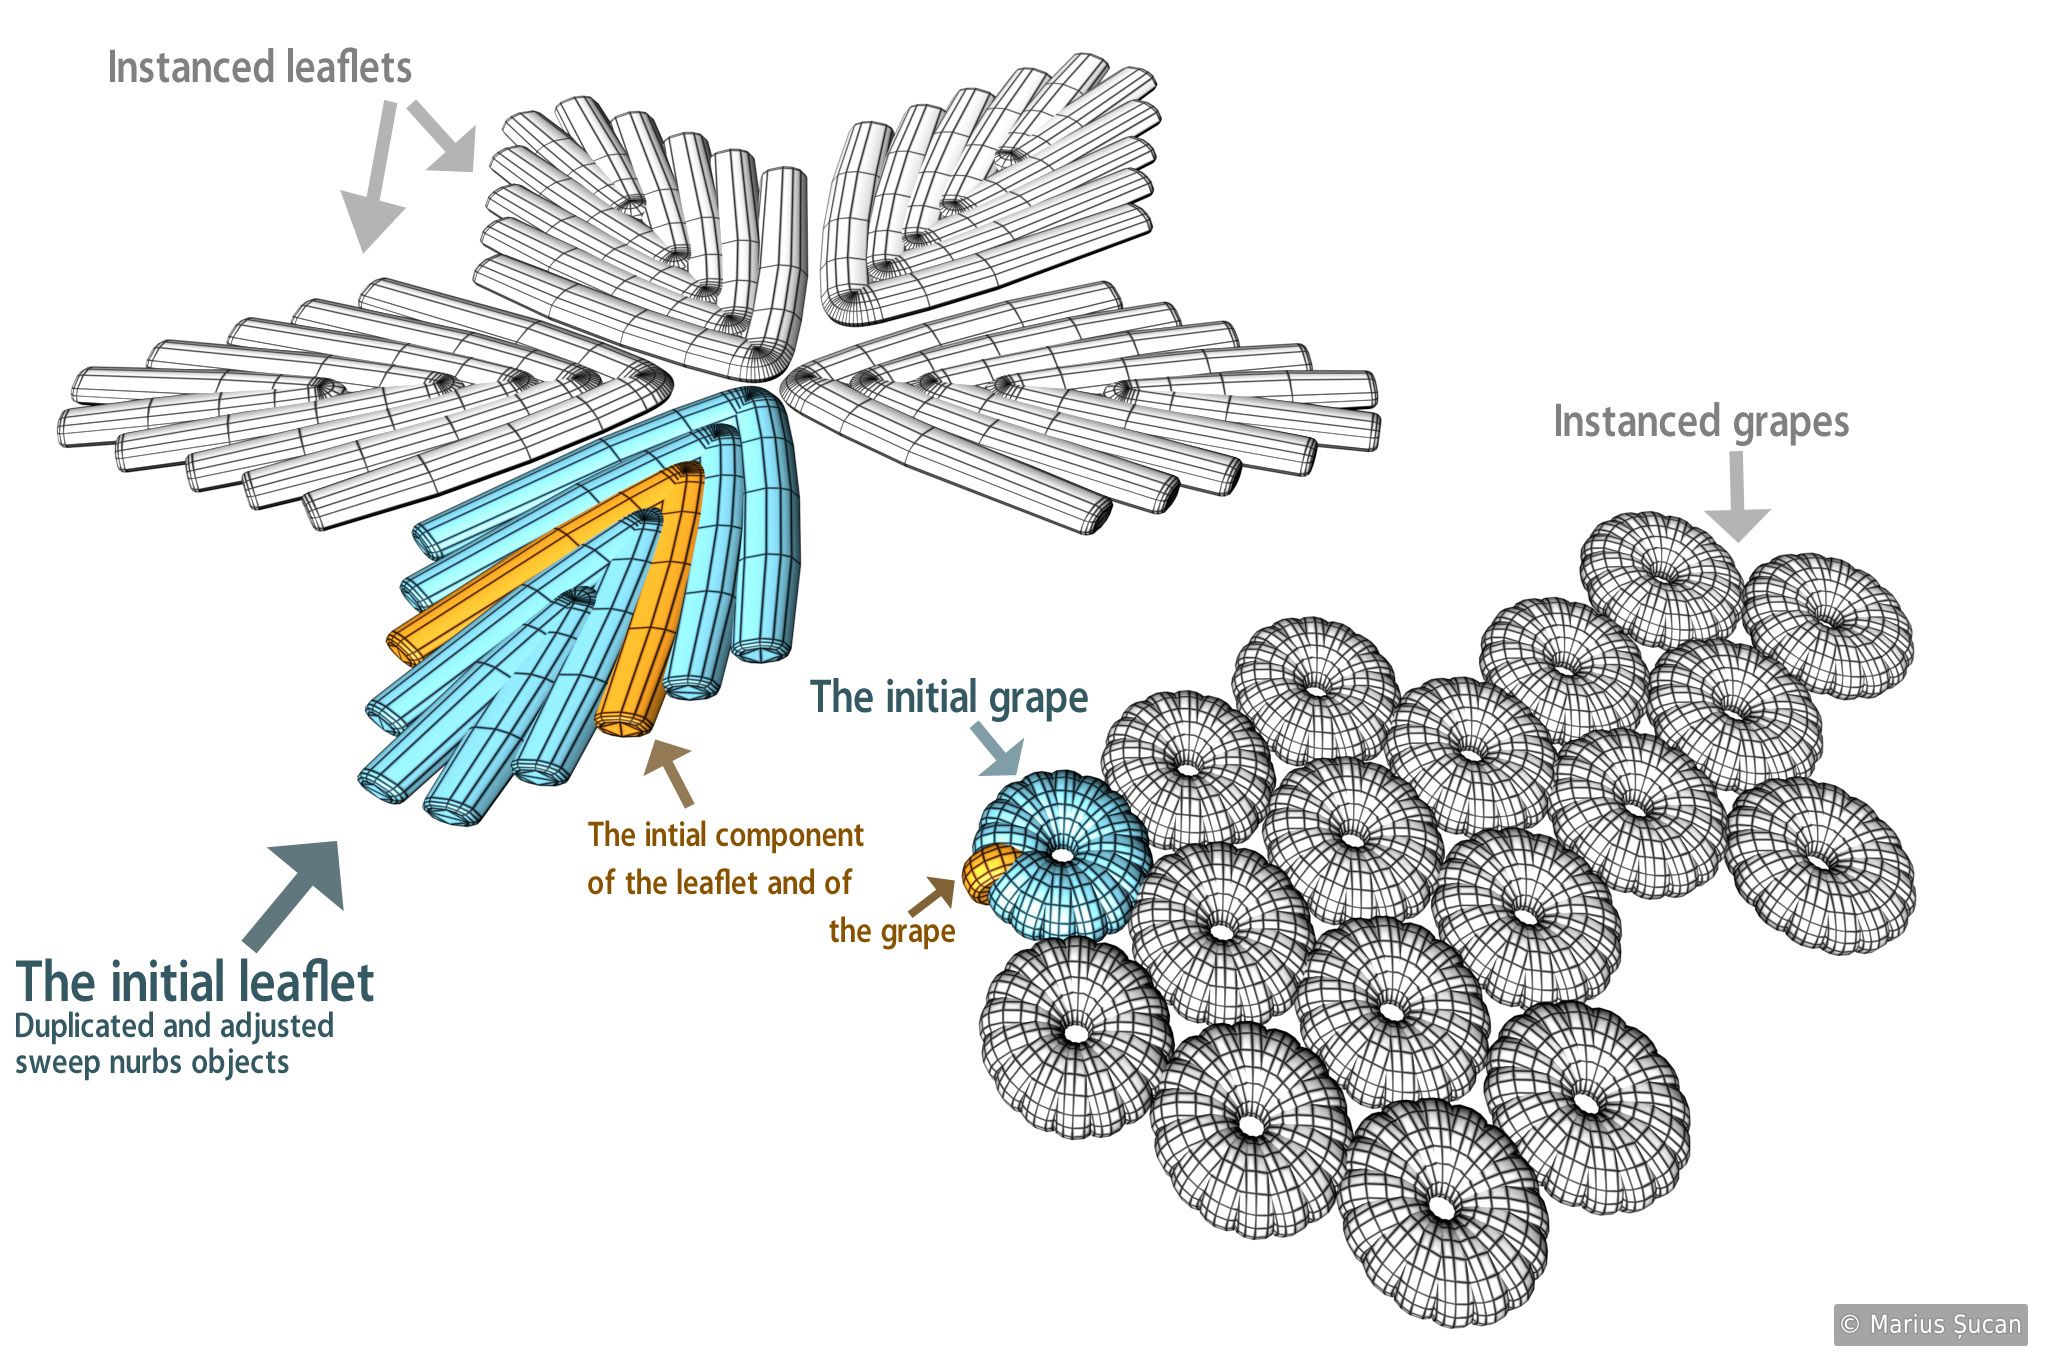
repetitive components of the design, such as the grapes clusters or the vineyard leaves, the whole thing became a
lot more simple. One little grape was done by having an array object cloning a tube, then this array was instanced
several times to reproduce the real life grapes cluster of the table cloth. I even counted the number of grapes
required to get it right. And finally, I instanced the whole cluster too.
I recreated the real model in 3D, by tracing splines in C4D. The splines were
used for the rather complex net which is connecting and holding together the whole design of the table cloth. I
used multiple Sweep nurbs objects to add thickness to the splines, accordingly to the real model. By noticing the
repetitive components of the design, such as the grapes clusters or the vineyard leaves, the whole thing became a
lot more simple. One little grape was done by having an array object cloning a tube, then this array was instanced
several times to reproduce the real life grapes cluster of the table cloth. I even counted the number of grapes
required to get it right. And finally, I instanced the whole cluster too.
For the leaves of the design, I traced one spline resembling the shape of V and then, with Sweep nurbs I added thickness. Afterwards I instanced it as required to shape one leaflet, which then was instanced to create the whole leaf. In the end, I was cloning this leaf throughout the design. The image on the right portrays this.
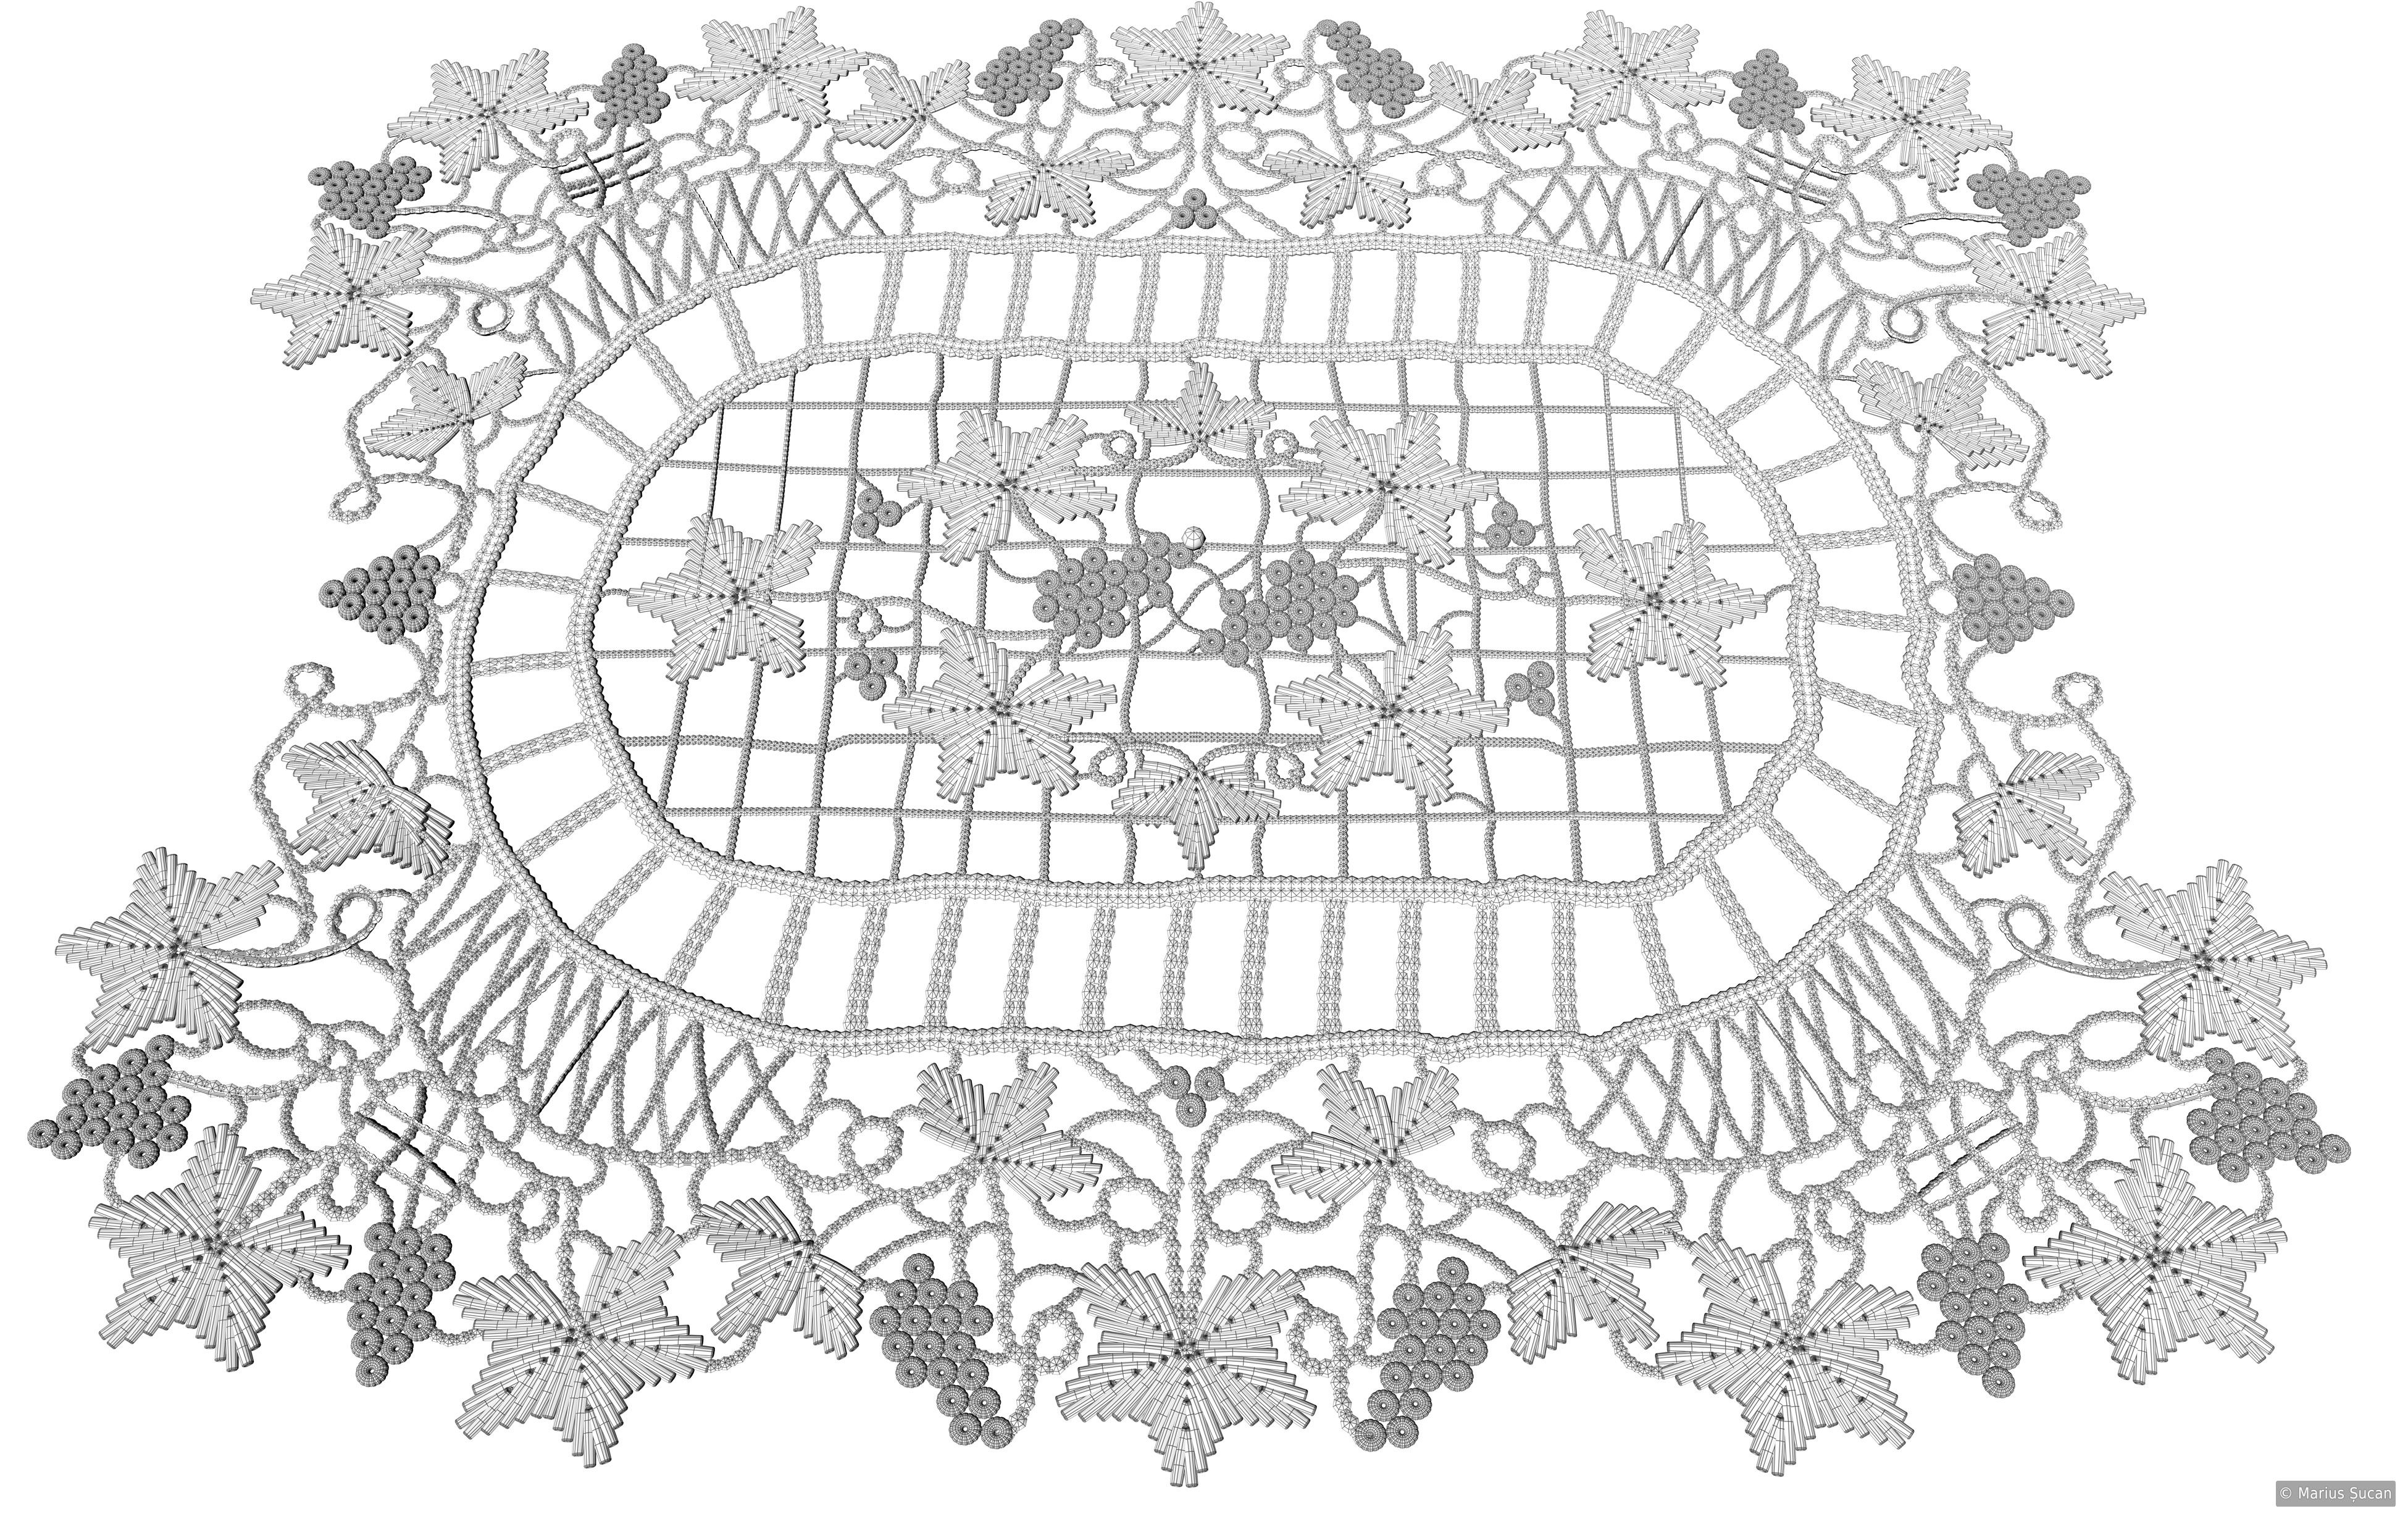 I had to use Mograph in the end to add the required details to the aforementioned net of splines which holds
together the whole design. I added a few cloner objects which cloned little spheres along the splines. I
alternated two spheres: one smaller than the other, to make it look more random. This went over the top, as the
number of polygons grew a lot. In the end, this object has about 2 millions polygons. In the next image you can
observe the little spheres cloned along the splines. The image is a top view of the overall design. I must mention
for the connoisseur, it's not a perfectly reproduced macramé design. It misses some details, hopefully minor ones.
I had to use Mograph in the end to add the required details to the aforementioned net of splines which holds
together the whole design. I added a few cloner objects which cloned little spheres along the splines. I
alternated two spheres: one smaller than the other, to make it look more random. This went over the top, as the
number of polygons grew a lot. In the end, this object has about 2 millions polygons. In the next image you can
observe the little spheres cloned along the splines. The image is a top view of the overall design. I must mention
for the connoisseur, it's not a perfectly reproduced macramé design. It misses some details, hopefully minor ones.
 What I had was just a macramé in an unusable state: entirely horizontal, flat. So, I had to relax it somehow on
the table. After a lot of fuss, I managed to turn it into an editable mesh. C4D
doesn't turn generators into editable meshes in a nice fashion, especially when you get to have complex hierarchies.
I had to export the object as an OBJ file, then to reimport it. To relax the object, I tried several techniques, except
one, which is obvious: the Cloth functionality from C4D. I did not use it, because
the algorithms for the physical simulations for relaxing objects on rigid surfaces, are incredibly slow. So,
relaxing such a complex like this macramé would have been a nightmare.
What I had was just a macramé in an unusable state: entirely horizontal, flat. So, I had to relax it somehow on
the table. After a lot of fuss, I managed to turn it into an editable mesh. C4D
doesn't turn generators into editable meshes in a nice fashion, especially when you get to have complex hierarchies.
I had to export the object as an OBJ file, then to reimport it. To relax the object, I tried several techniques, except
one, which is obvious: the Cloth functionality from C4D. I did not use it, because
the algorithms for the physical simulations for relaxing objects on rigid surfaces, are incredibly slow. So,
relaxing such a complex like this macramé would have been a nightmare.
To solve the challenge, the first technique I tried was to use the soft selection, with a given pivot, and then to rotate by 90 degrees the section outside the table top area. This was almost the right solution, but there were loads of polygons which didn't bend properly. The initial macramé was totally parametric, as such, I was able to control the amount of polygons of all components of the design. The tool was functioning abso-freakin-lutely slow on my machine. In the end, I successfully used the Bend deformer from C4D to relax the whole thing on the table top.
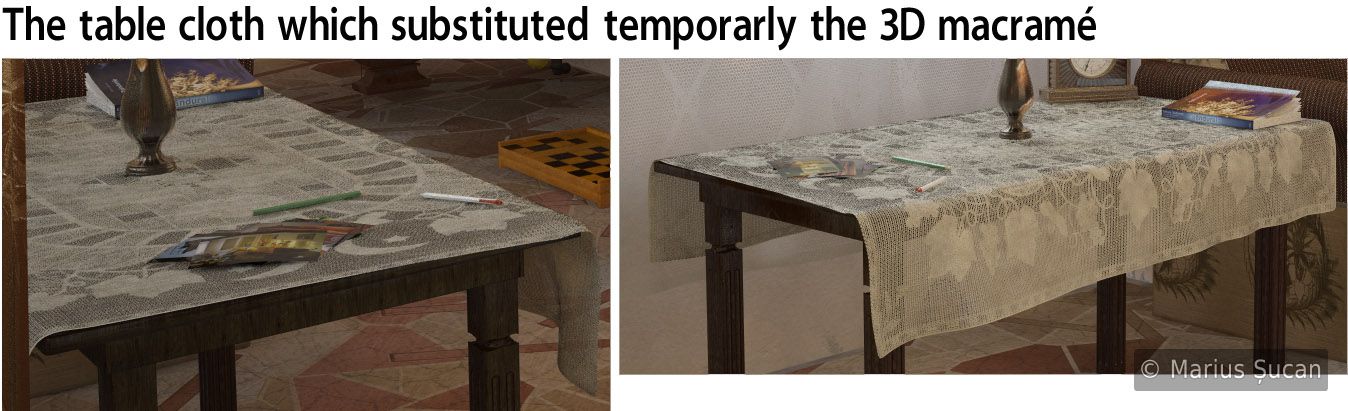
Because the modeling of this macramé took a lot of time, from November 2008 to late April 2009, I had other backup solutions. To be more precise, the first version of the macramé was rather simplistic. It wasn't detailed with Mograph cloned spheres and the grapes were simple torus objects, thus a grapes clusters was only about cloning the torus. Also, the leaves were a simple extruded spline. I was thinking, initially, that I could detail it with SPD, but I was wrong, because the UV maps were totally broken. Back then, I was working in 32 bits mode, so I was limited to only 3 Gb of memory. The utterly intensive "new" macramé, which I described above, was done after a long time, when I moved to a 100% 64 bits environment, thus my worries of not having sufficient memory were gone ;). In-between, I used a simple table cloth which had a texture resembling macramé's design (see image below). Of course, I wasn't satisfied of it, so I had to change it to the polygonally intensive and all shiny brand new macramé :).
Flowers
For all the flowers I used Xfrog, without any preset.
In the vases, I wanted to have bouquets. So, initially I modeled one, but it was too chaotic and too polygonally intensive. This bouquet consisted of semi-fantasy flowers, thus it wasn't really realistic, so I decided to focus on two types of flowers.
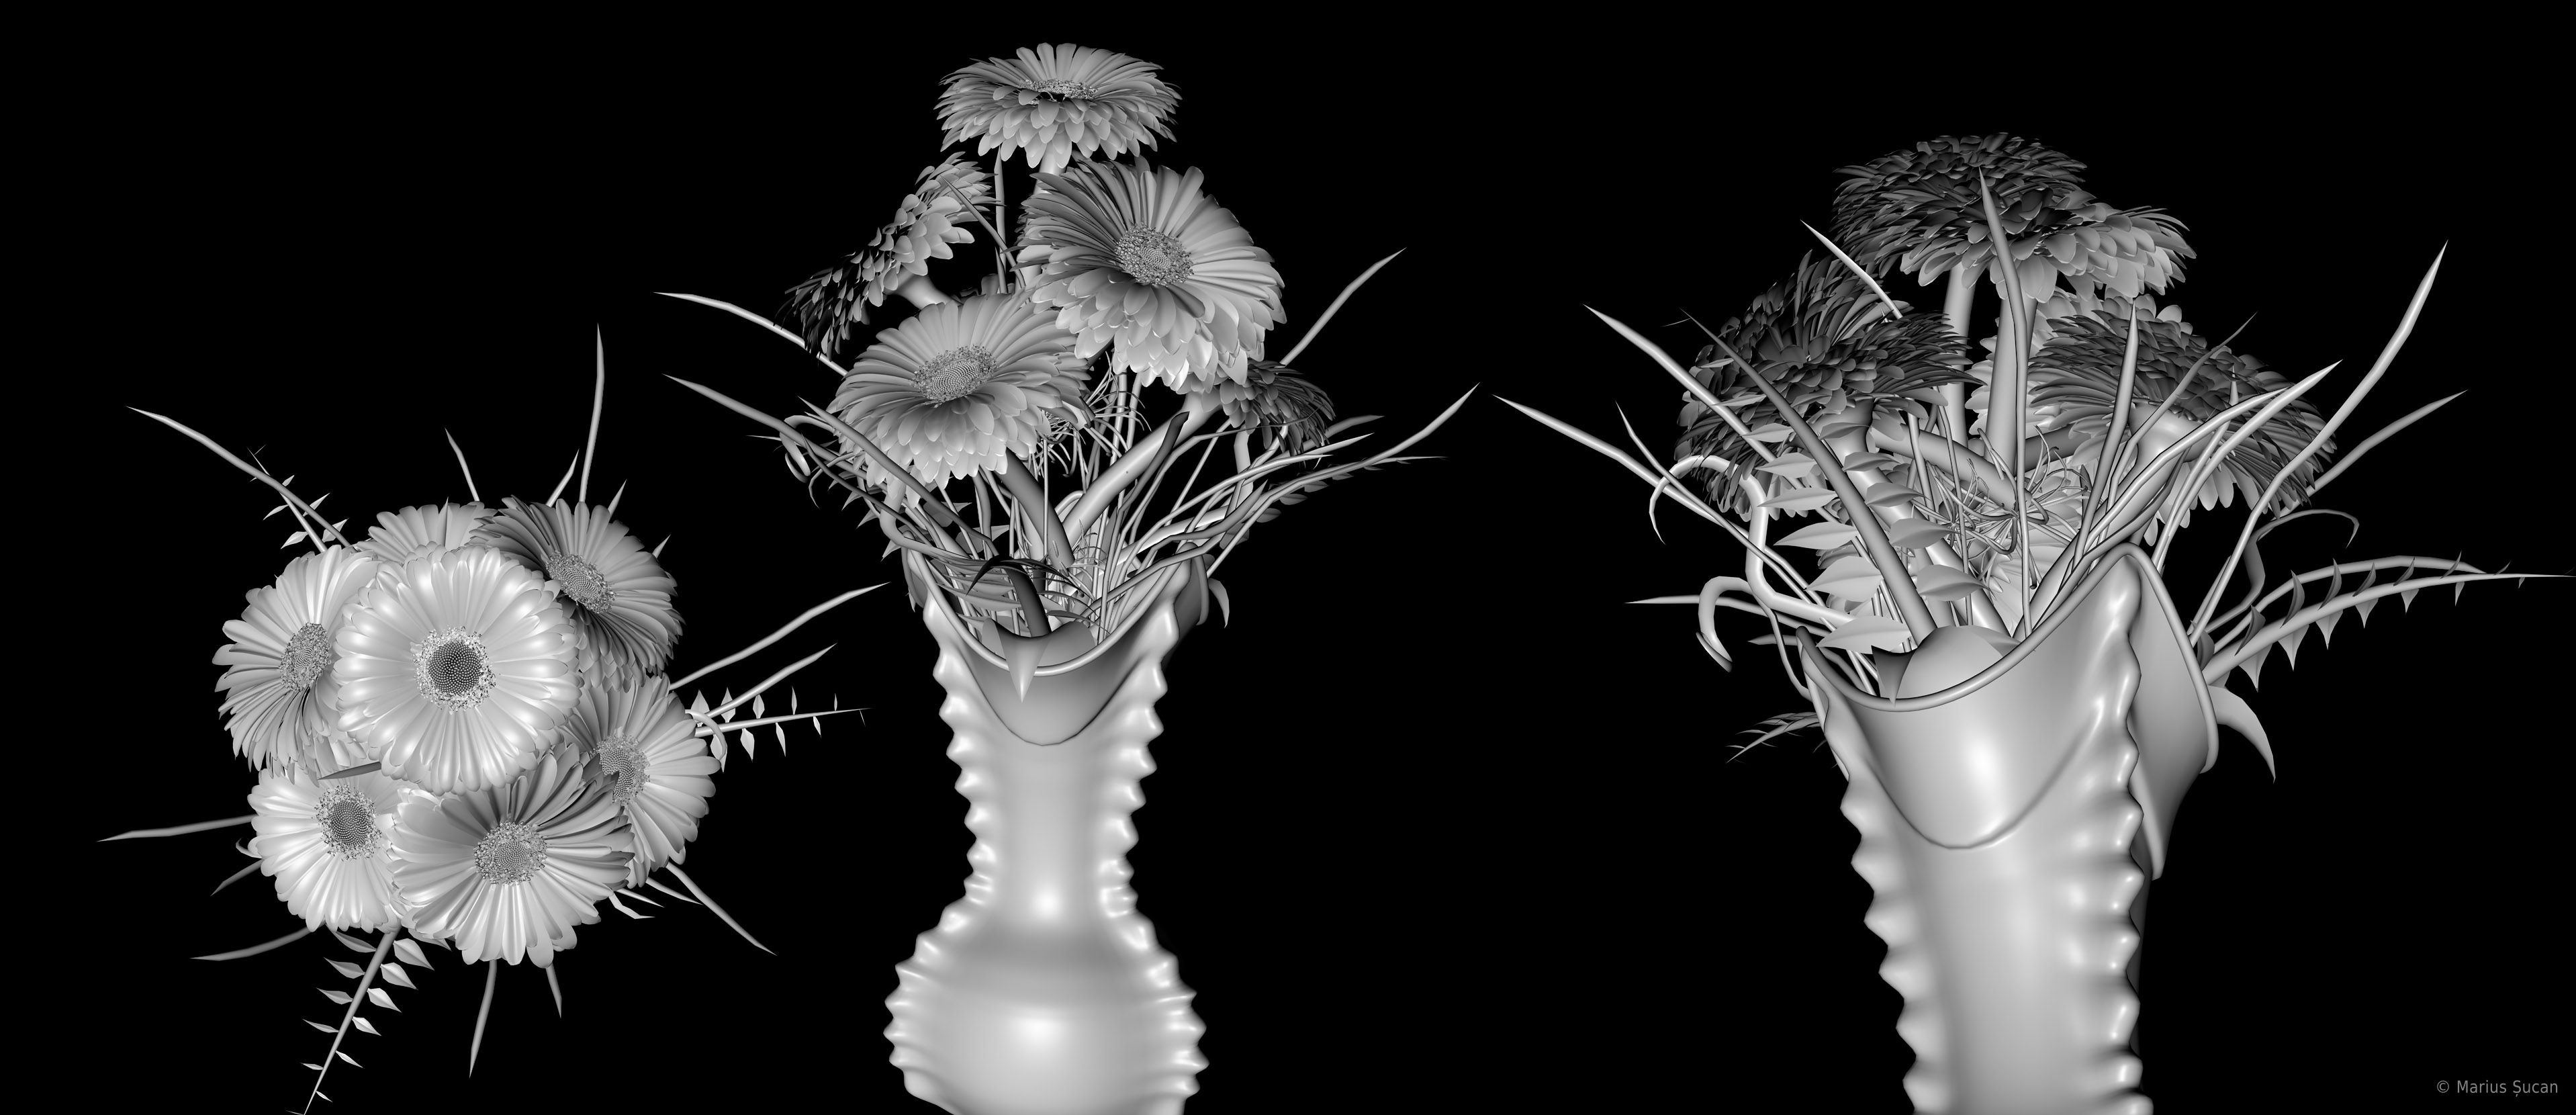
I created a set of relatively nice dahlias for the vase on the piano and Gerberas for the other vase, but I still wasn't content. I changed the Dahlias with Mimosas.
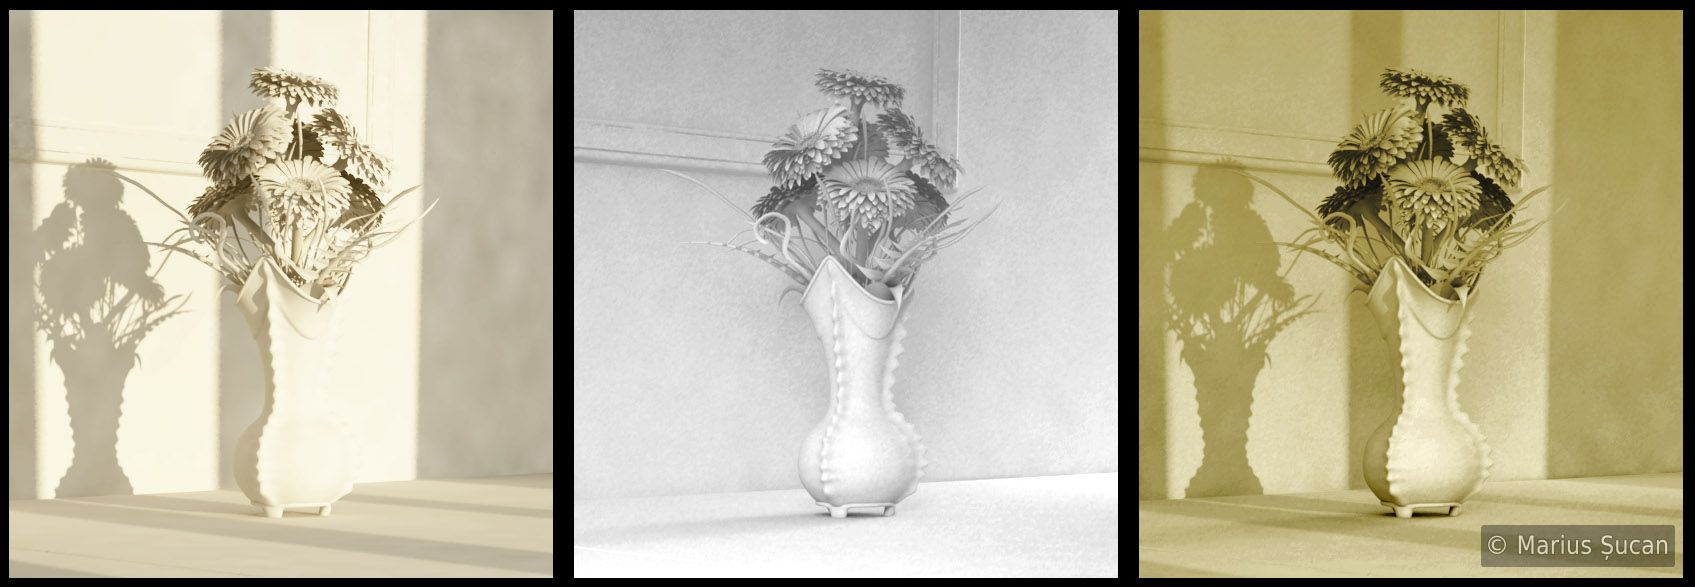
The dahlias were almost there, in terms of my expectations. I even textured them and I added variety into the small petals. The distribution of the petals was achieved with a Phyllotaxis object. The next image is rendered with AR.

The petals for the Gerberas were distributed with a Phyllotaxis object as well and a few Variation objects in order to make them look more random. The very petal is modeled / generated with the Branch object of Xfrog, I made several variations which are cloned randomly. The kernel, the center of the Gerberas, is made with the Phyllotaxis object and for the bright ring, I cloned along a torus many little spheres and cubes.
After I finished the Gerberas, generally speaking, I turned them editable and then, I adjusted each petal to not intersect with other petals.

The mimosas, which replaced the dahlias in the end, were substantially more complex in terms of geometry. In general, they were more simple, but it was all about achieving the right branching and distribution. They are really very polygonal intensive as well. I turned them into an editable mesh to remove most of the intersections. The little yellow flowers are just spheres, of course, distributed with Xfrog.

Other objects
In general, the whole room was modeled using the primitive objects of C4D, mostly planes, cubes and cylinders. The walls are planes, cut out with booleans for the doors. The door frames are built with sets of cubes and cylinders. The following images show the rest of the room:

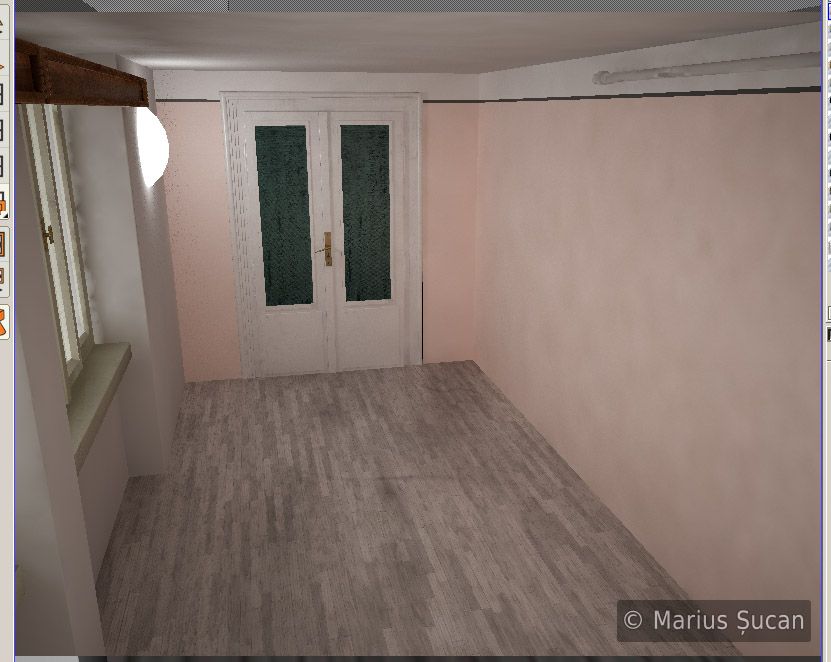
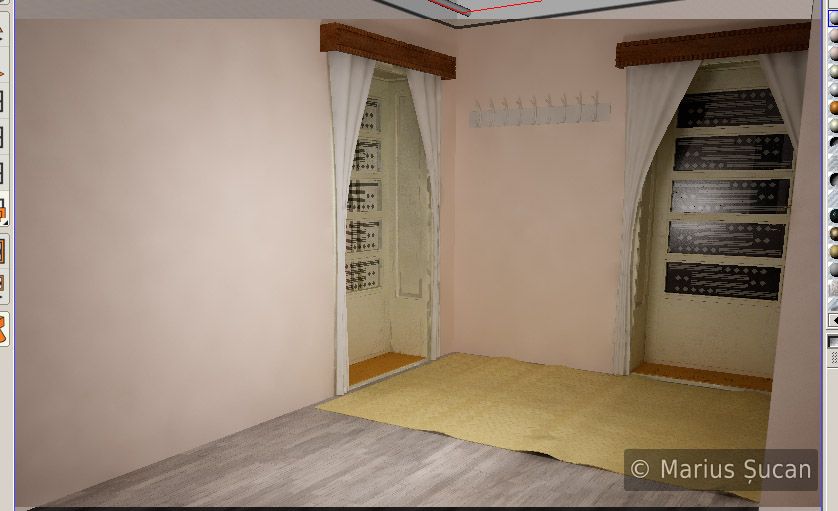
For the curtains I used a Loft nurbs object with non-closed splines. I also used the Mograph material effector to add a bit of variety to the mesh.
The linoleum is a plane turned into an editable mesh, then bent and deformed a bit: subtle waves. The carpet is also a plane with added thickness and detailed with SPD.
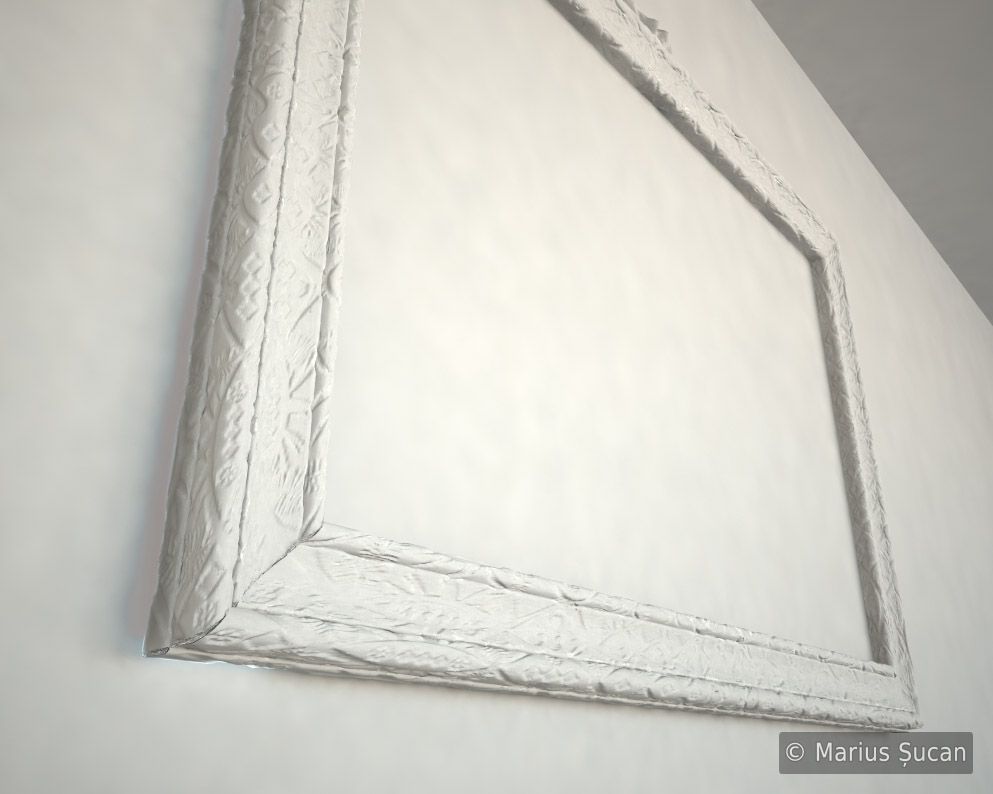
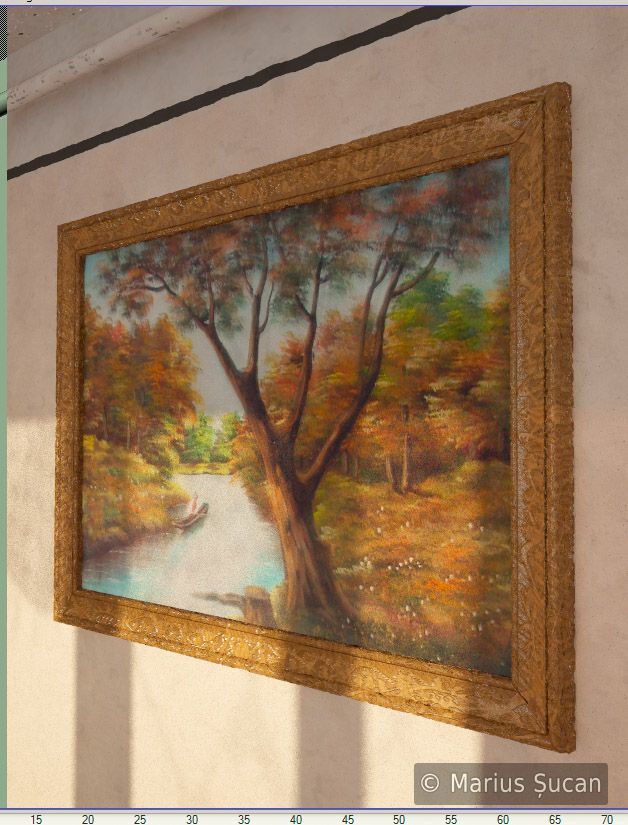
The frame of the wall painting is done with an extrude nurbs object and then instanced to get all four sides. I used SPD to detail the frame. Here you can see two renders with it: untextured and textured. The painting itself was extracted from multiple photos of the real painting.
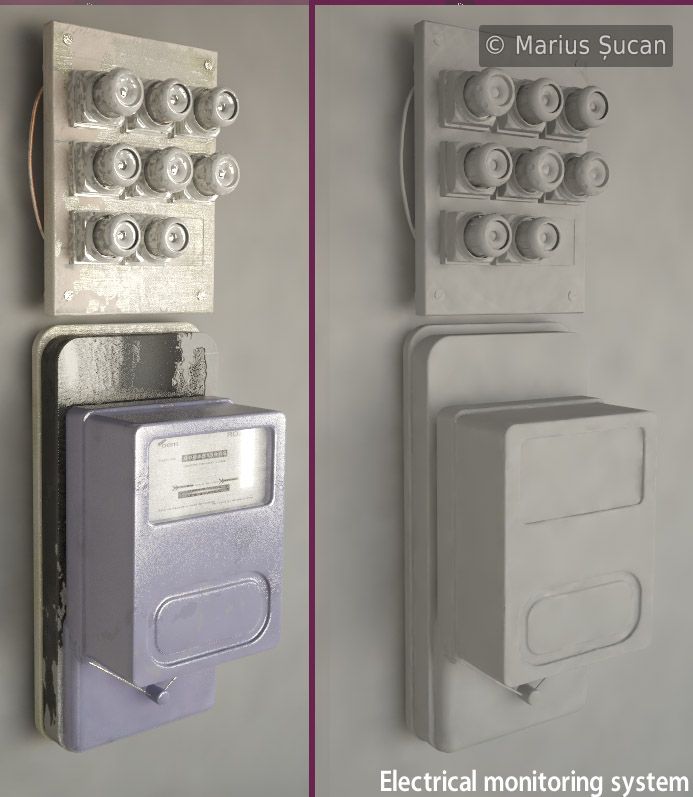
The electric monitoring system is modeled using primitives as well. The fuses were instanced after modeling two types. Basically, I used booleans and primitives to shape them, and also a bit of polygonal modeling.
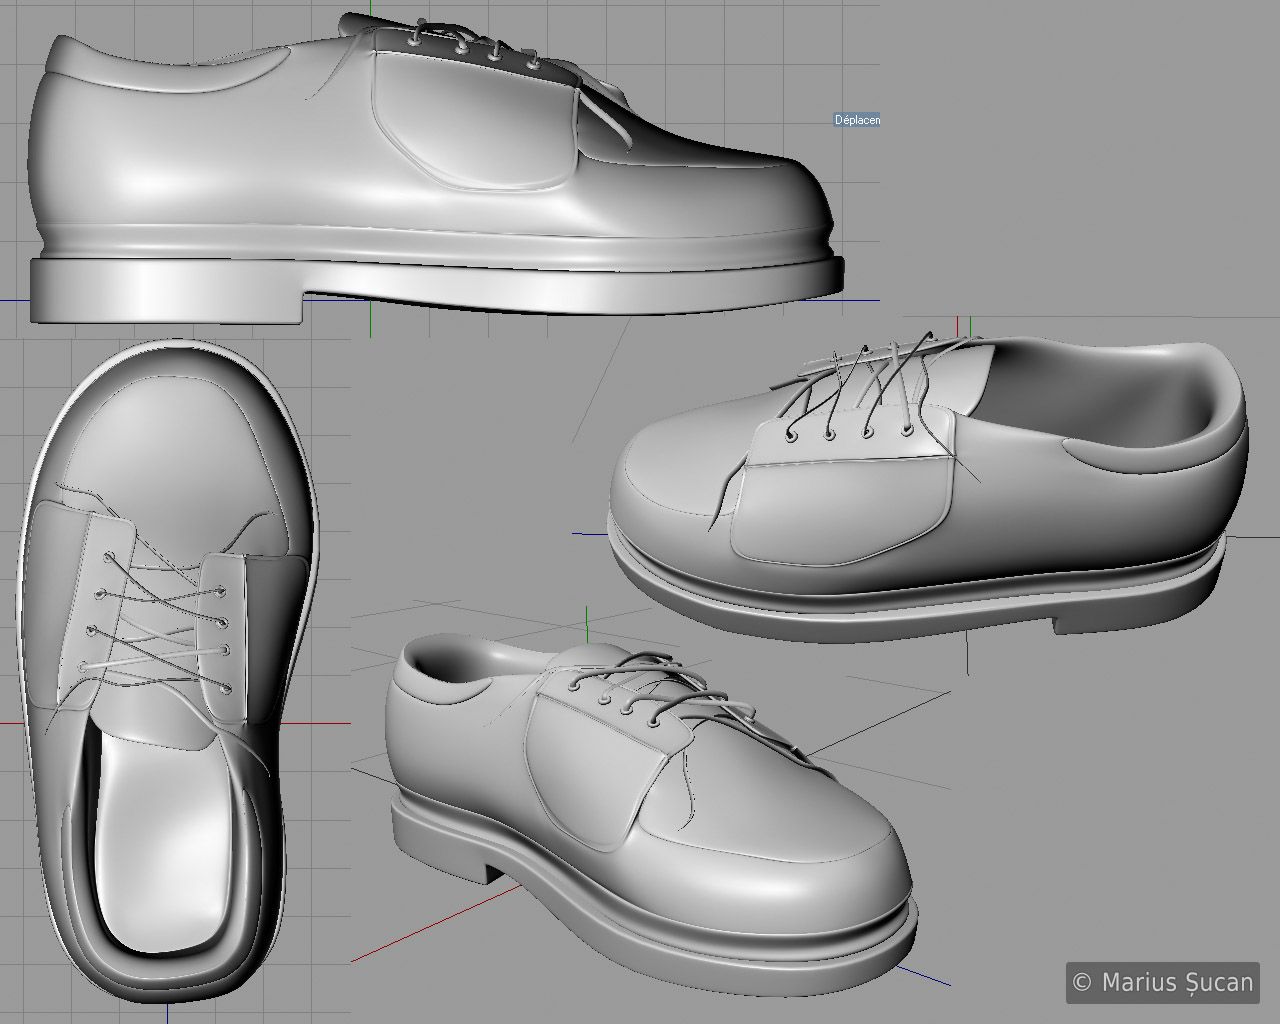
I also modeled several types of shoes to put in the scene:

Next page: Textures
Previous page: Introduction