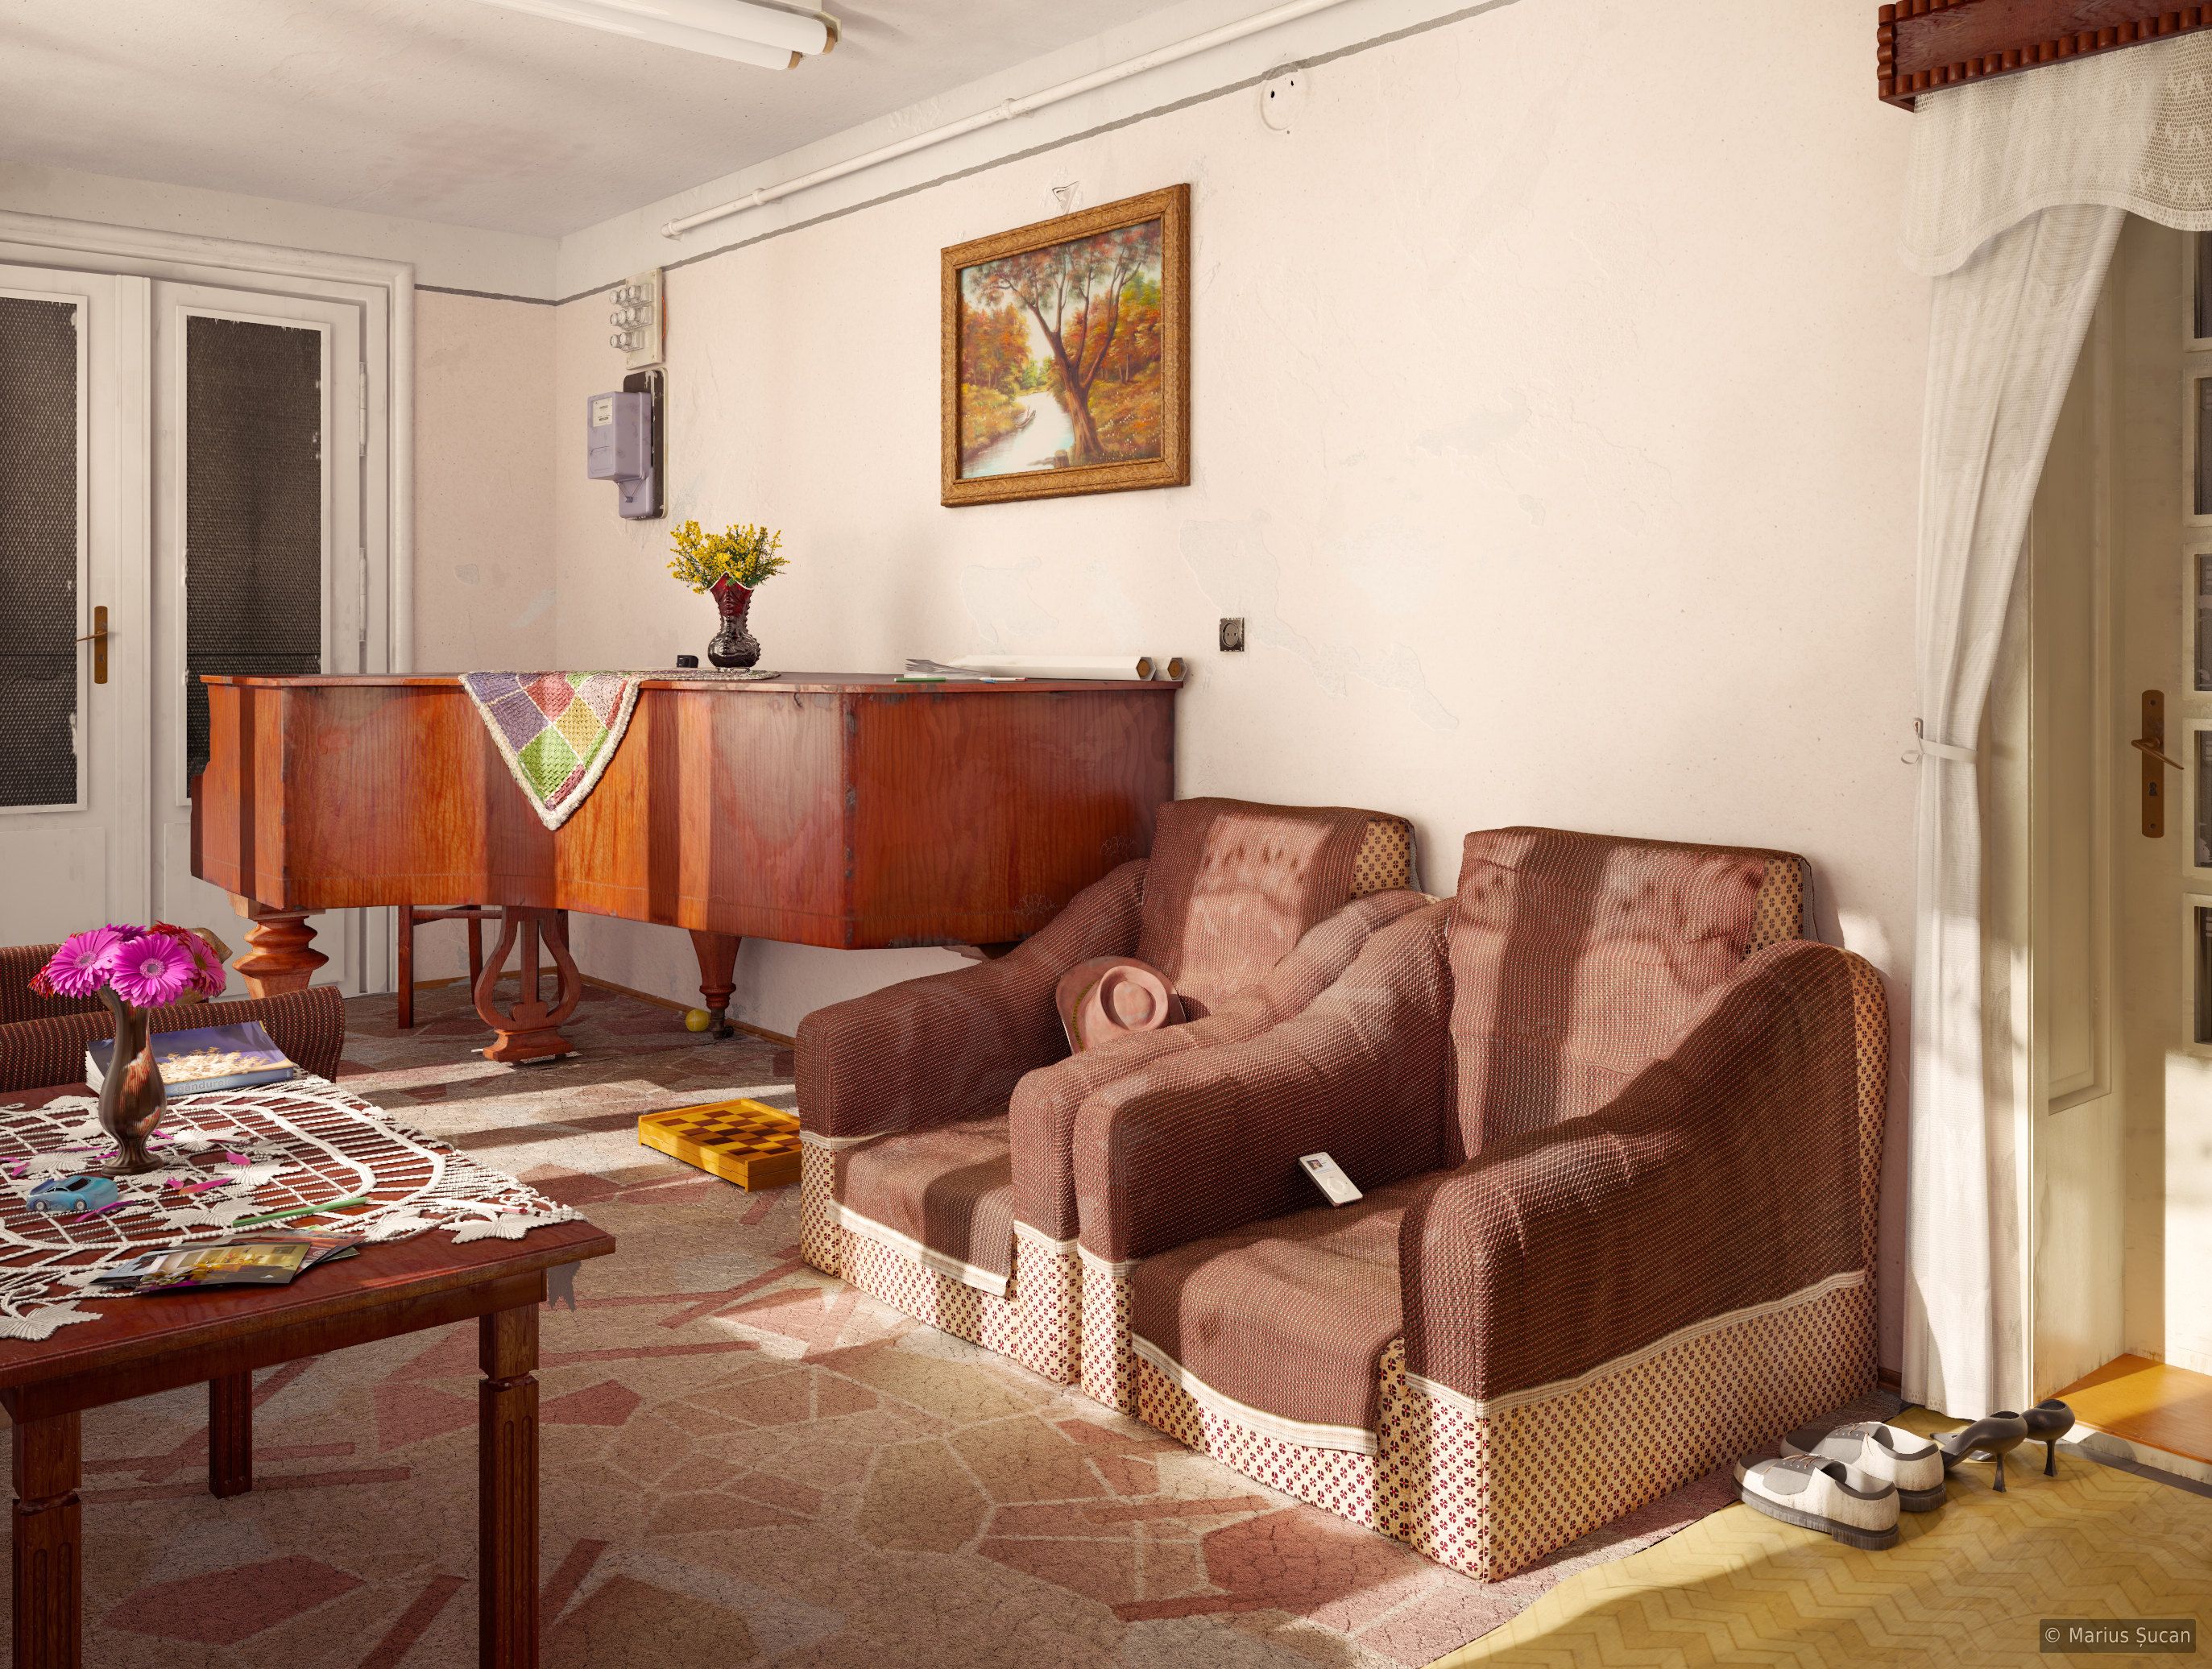
Making of: the piano room
Table of contents
- Introduction
- Models
- Textures
- Light setup
- Rendering
- Post-processing
- Time-lapse renders
Post-processing
All of the three final renders were finished in 6 days. I spent two more weeks to render layers for post-processing the images on my own PC. The original renders were too blunt for my liking and, therefore I wanted to heavily post-process them to my liking.
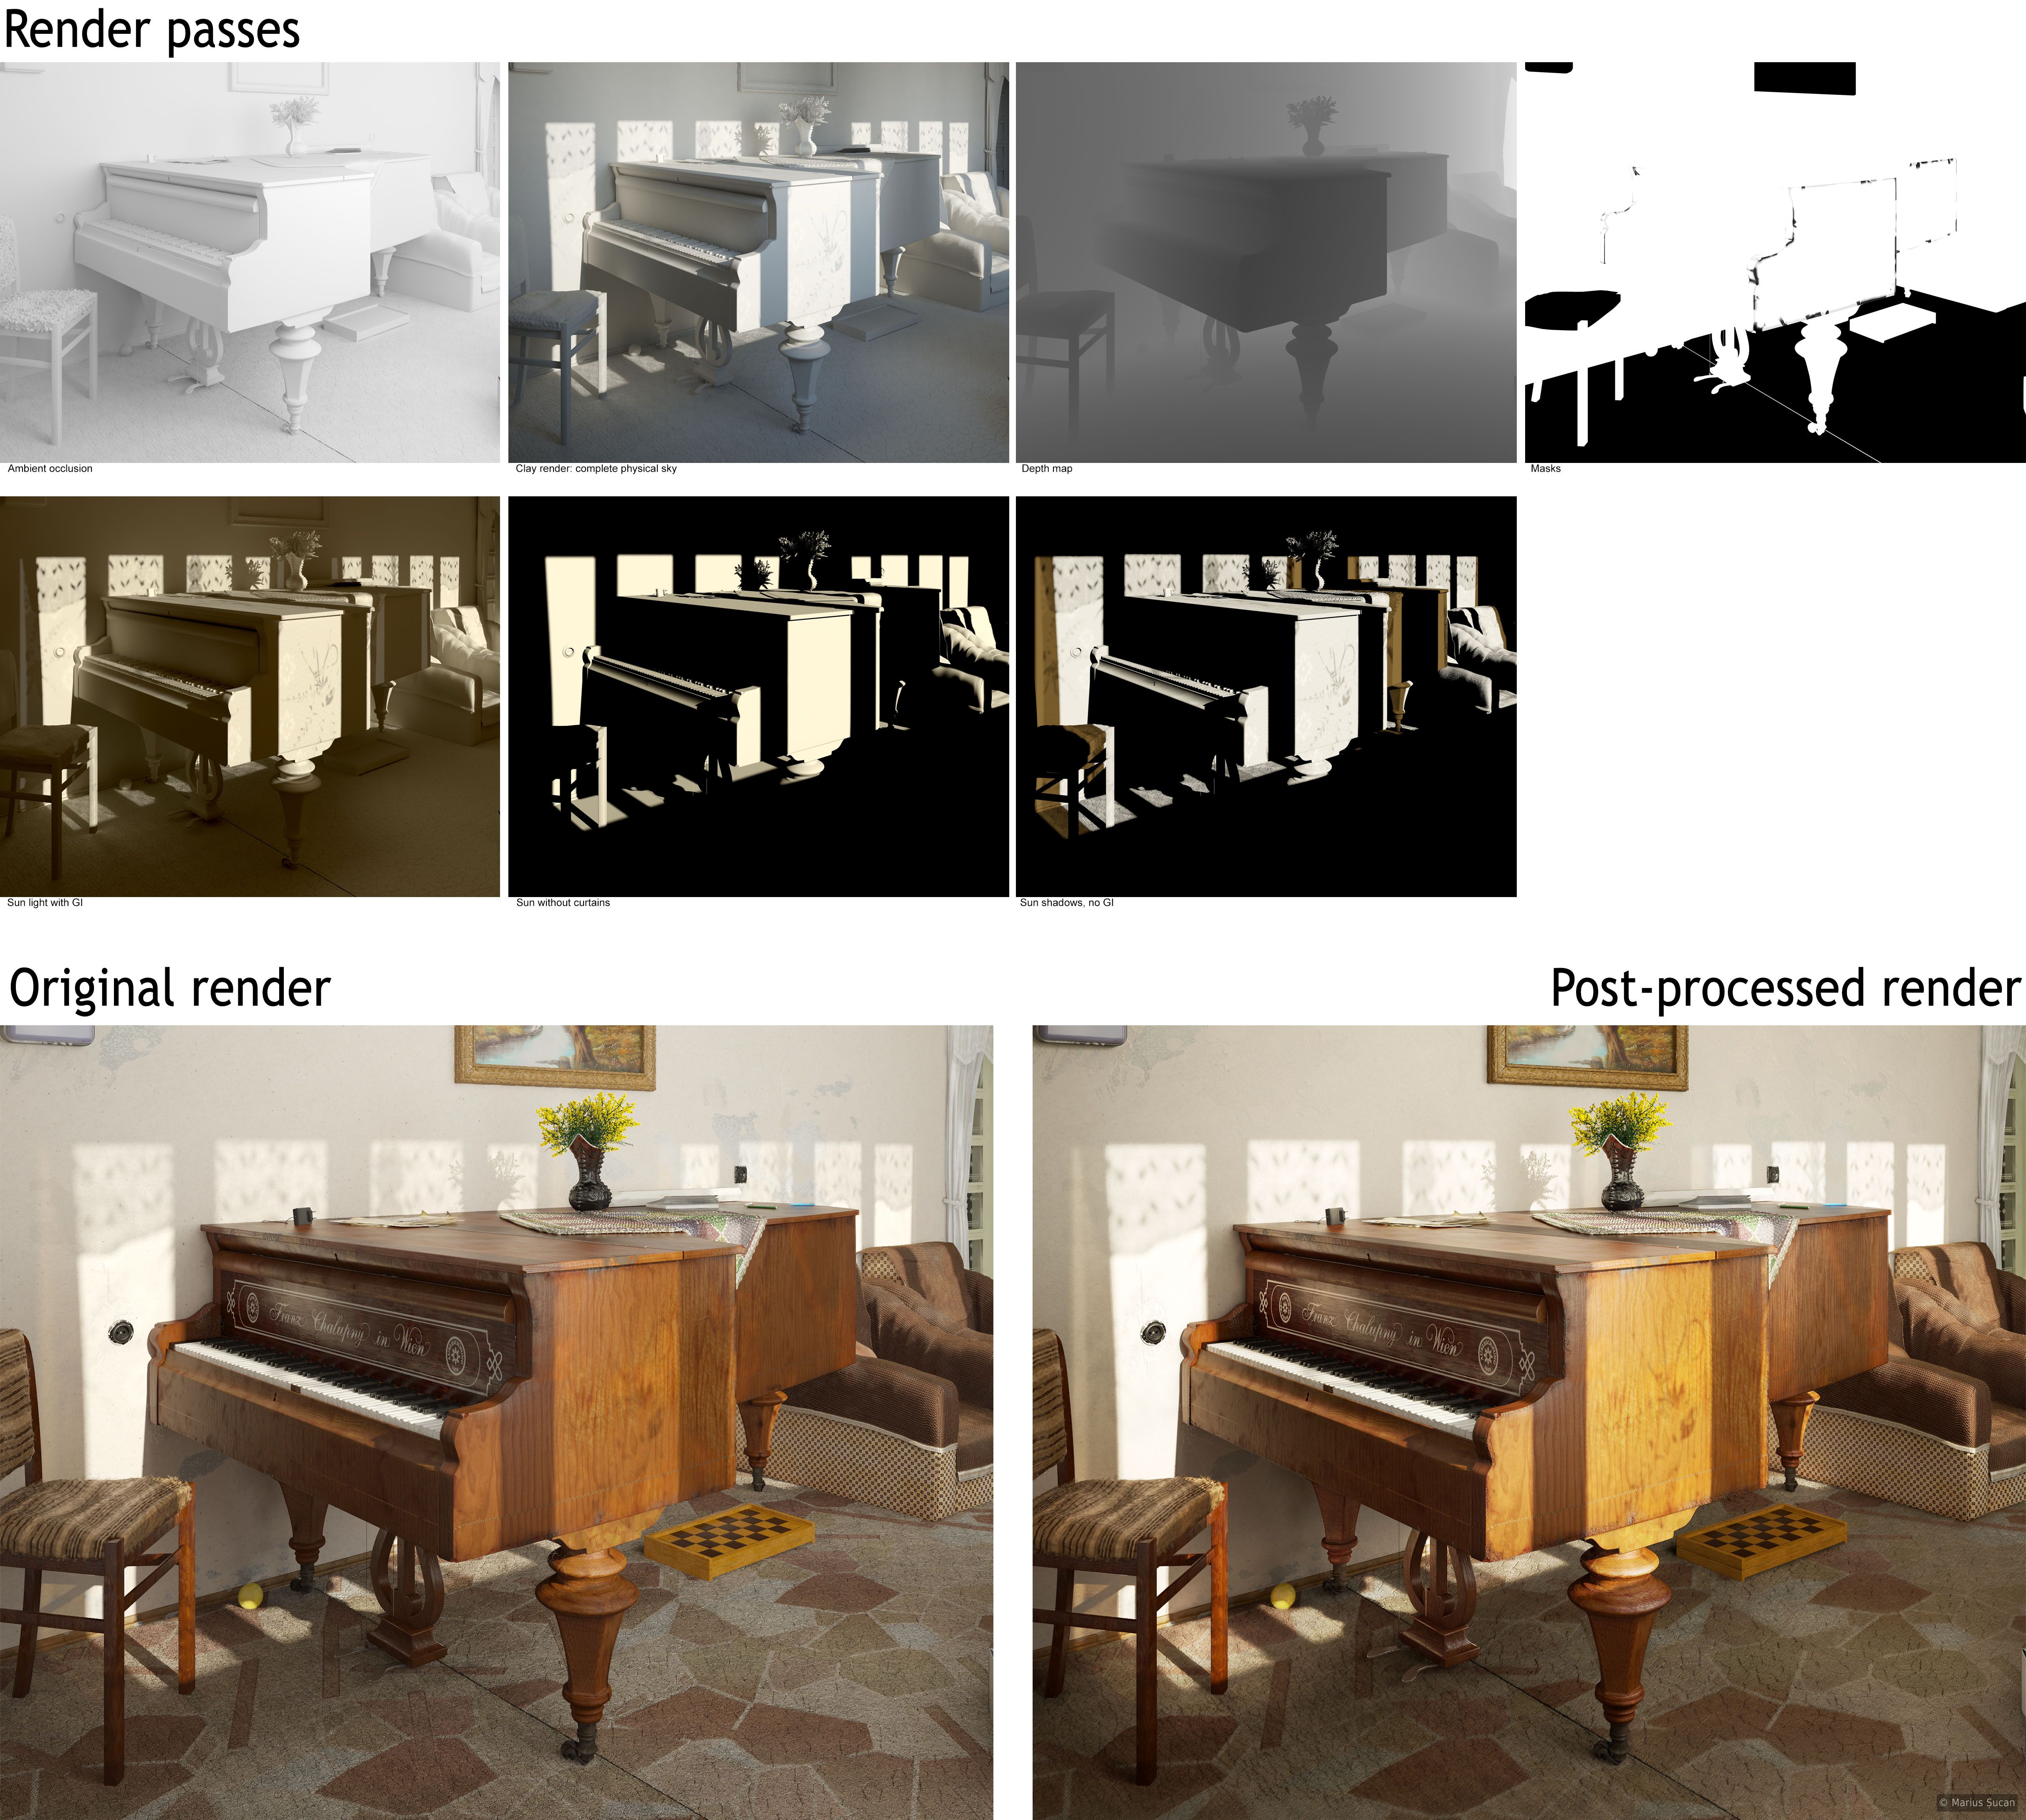
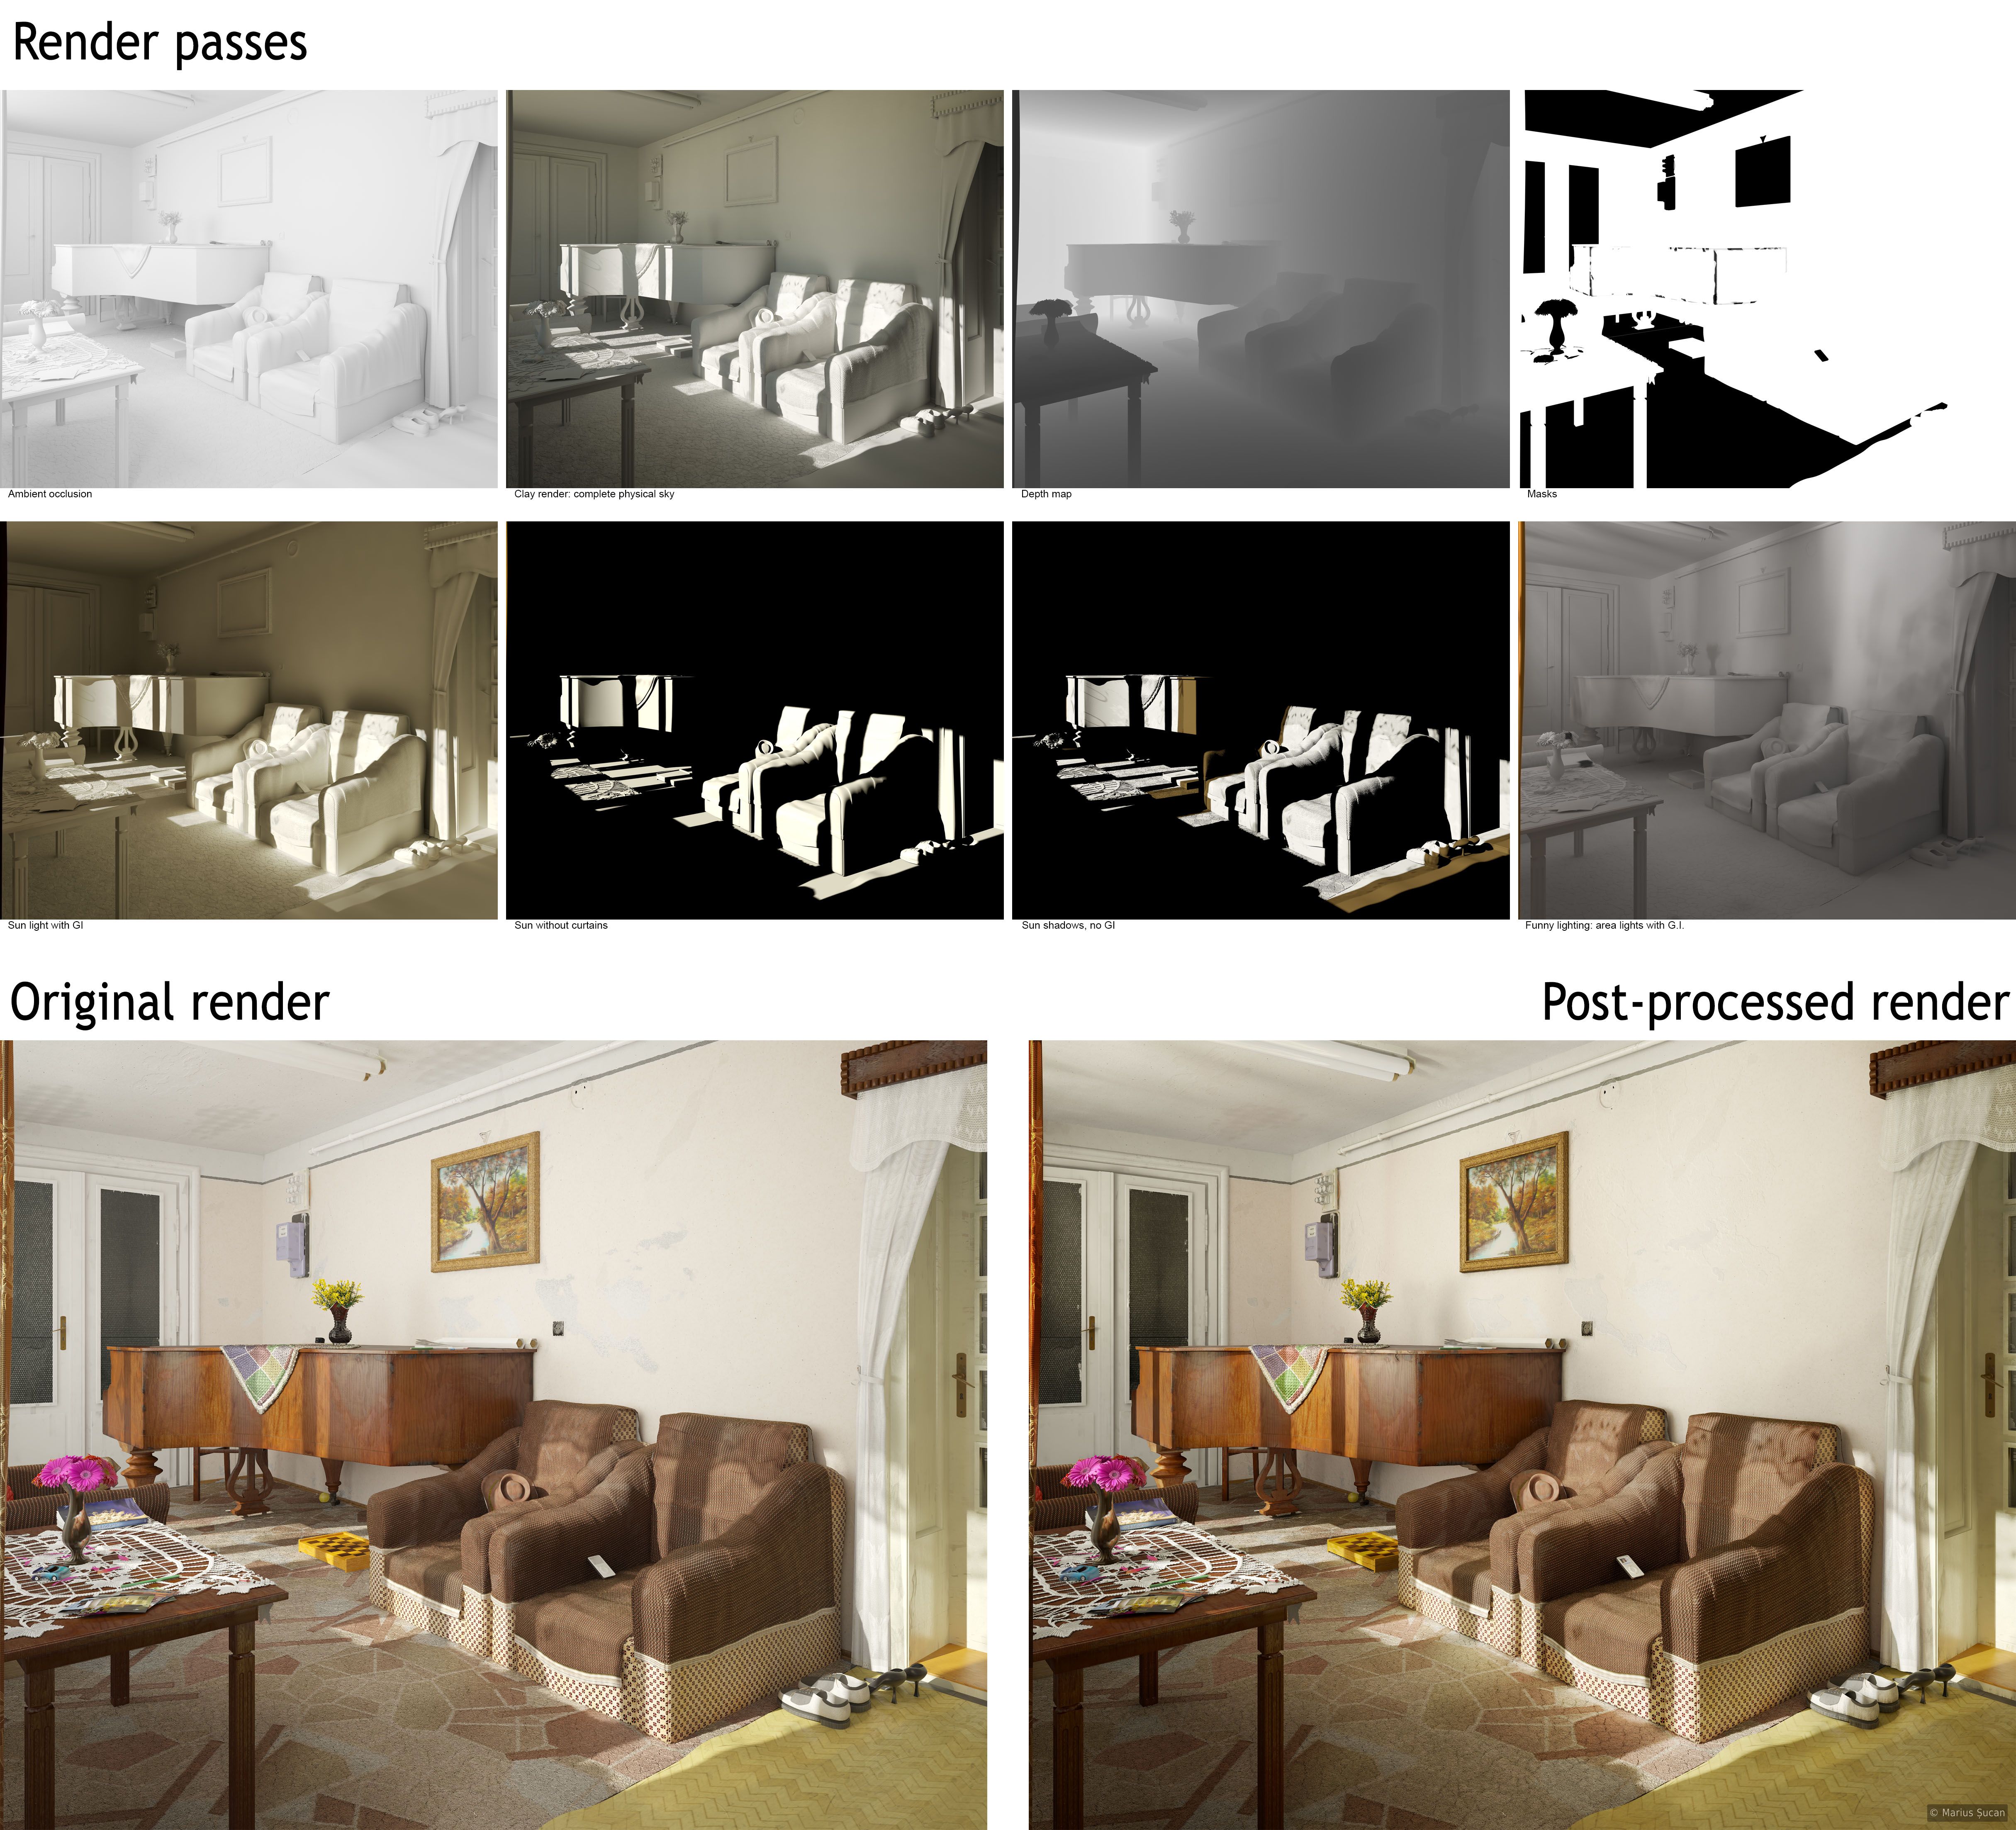
For post-processing, I rendered a multitude of layers for each perspective. The layers are all clay renders, but with different light setups which are meant to emphasize different aspects of the lighting in the given perspective. I rendered two types of ambient occlusion (AO) passes: the classical AO shader from C4D, a pass which in the end I didn't use, and a Vray type of AO. The Vray AO was obtained by having the environment set to white and the material of the objects almost white, a tip I learned from the VrayforC4D forums. I also rendered a depth map pass, black and white masks of objects and a clay render with the complete lighting with physical sun and sky, with GI on, for all the three perspectives. To control the impact of the sunlight, without the sky, I rendered a special pass just for the sun with GI on. The resulting image gave me the possibility to control the amount of light bounced by the sun beams on the floor and objects. And, of course, I rendered another pass with no GI and with the curtains to cast shadows, so that I can also control the sunlight beams intensity on the objects.
I made all the general passes for the final renders, but I also had ideas for passes specific only to a given perspective. For the armchairs perspective (POV 2), I rendered a so called, funny light setup, to make the lighting seem a bit more irregular in the final render. This pass was done with area lights only. For the windows perspective (POV 3), I rendered a pass with volumetric lighting with C4D and an alpha mask with the floral motif of the curtains. Because I wasn't really content of how much GI the curtains generate in the room, I dedicated a pass for this. The pass consists of having the curtains opaque and with a very strong SSS, as such that it is generating a lot of GI. This gave me the possibility to strengthen the light generated by them.
In the following images I list the post-processing passes I rendered. All these passes were used in Adobe Photoshop. I also show you the renders as they were before post-processing them. If you pay attention to the details, you may notice that many adjustments and fixes were applied for all three renders, besides the obvious work I've put into the lighting.

Attention: the file size of the above images is 2,3 mb. The resolution is around 4800 x 5000 pixels.
All renders were saved as HDR images from C4D and VrayforC4D at the resolution of 2800 x 2240 pixels. For optimal quality, all HDR files were converted in Photoshop to 16 bits and the entire post-processing was done in 16 bits per channel.
The passes were used in Photoshop as layers or as masks. Just like in the shaders I used to texture the 3D objects, I stacked a multitude of layers in Photoshop: variations of the rendered passes, colour adjustments layers and render fixed patches. I prepared a single image showing all the Photoshop layers with thumbnails and all the associated dynamic effects applied on them, and their properties: blending mode and opacity. The key in post-processing is having the right render passes and then, using them with appropriate blending modes to get to the right effects. Of course, the mask feature helps you to isolate the impact of the blended pass to the areas you like. One shouldn't be limited to the rendered passes. Using the colour adjustments tools in conjunction with the available blending modes, one can obtain many variations of the already rendered passes to blend over the original render, thus ease the whole process.

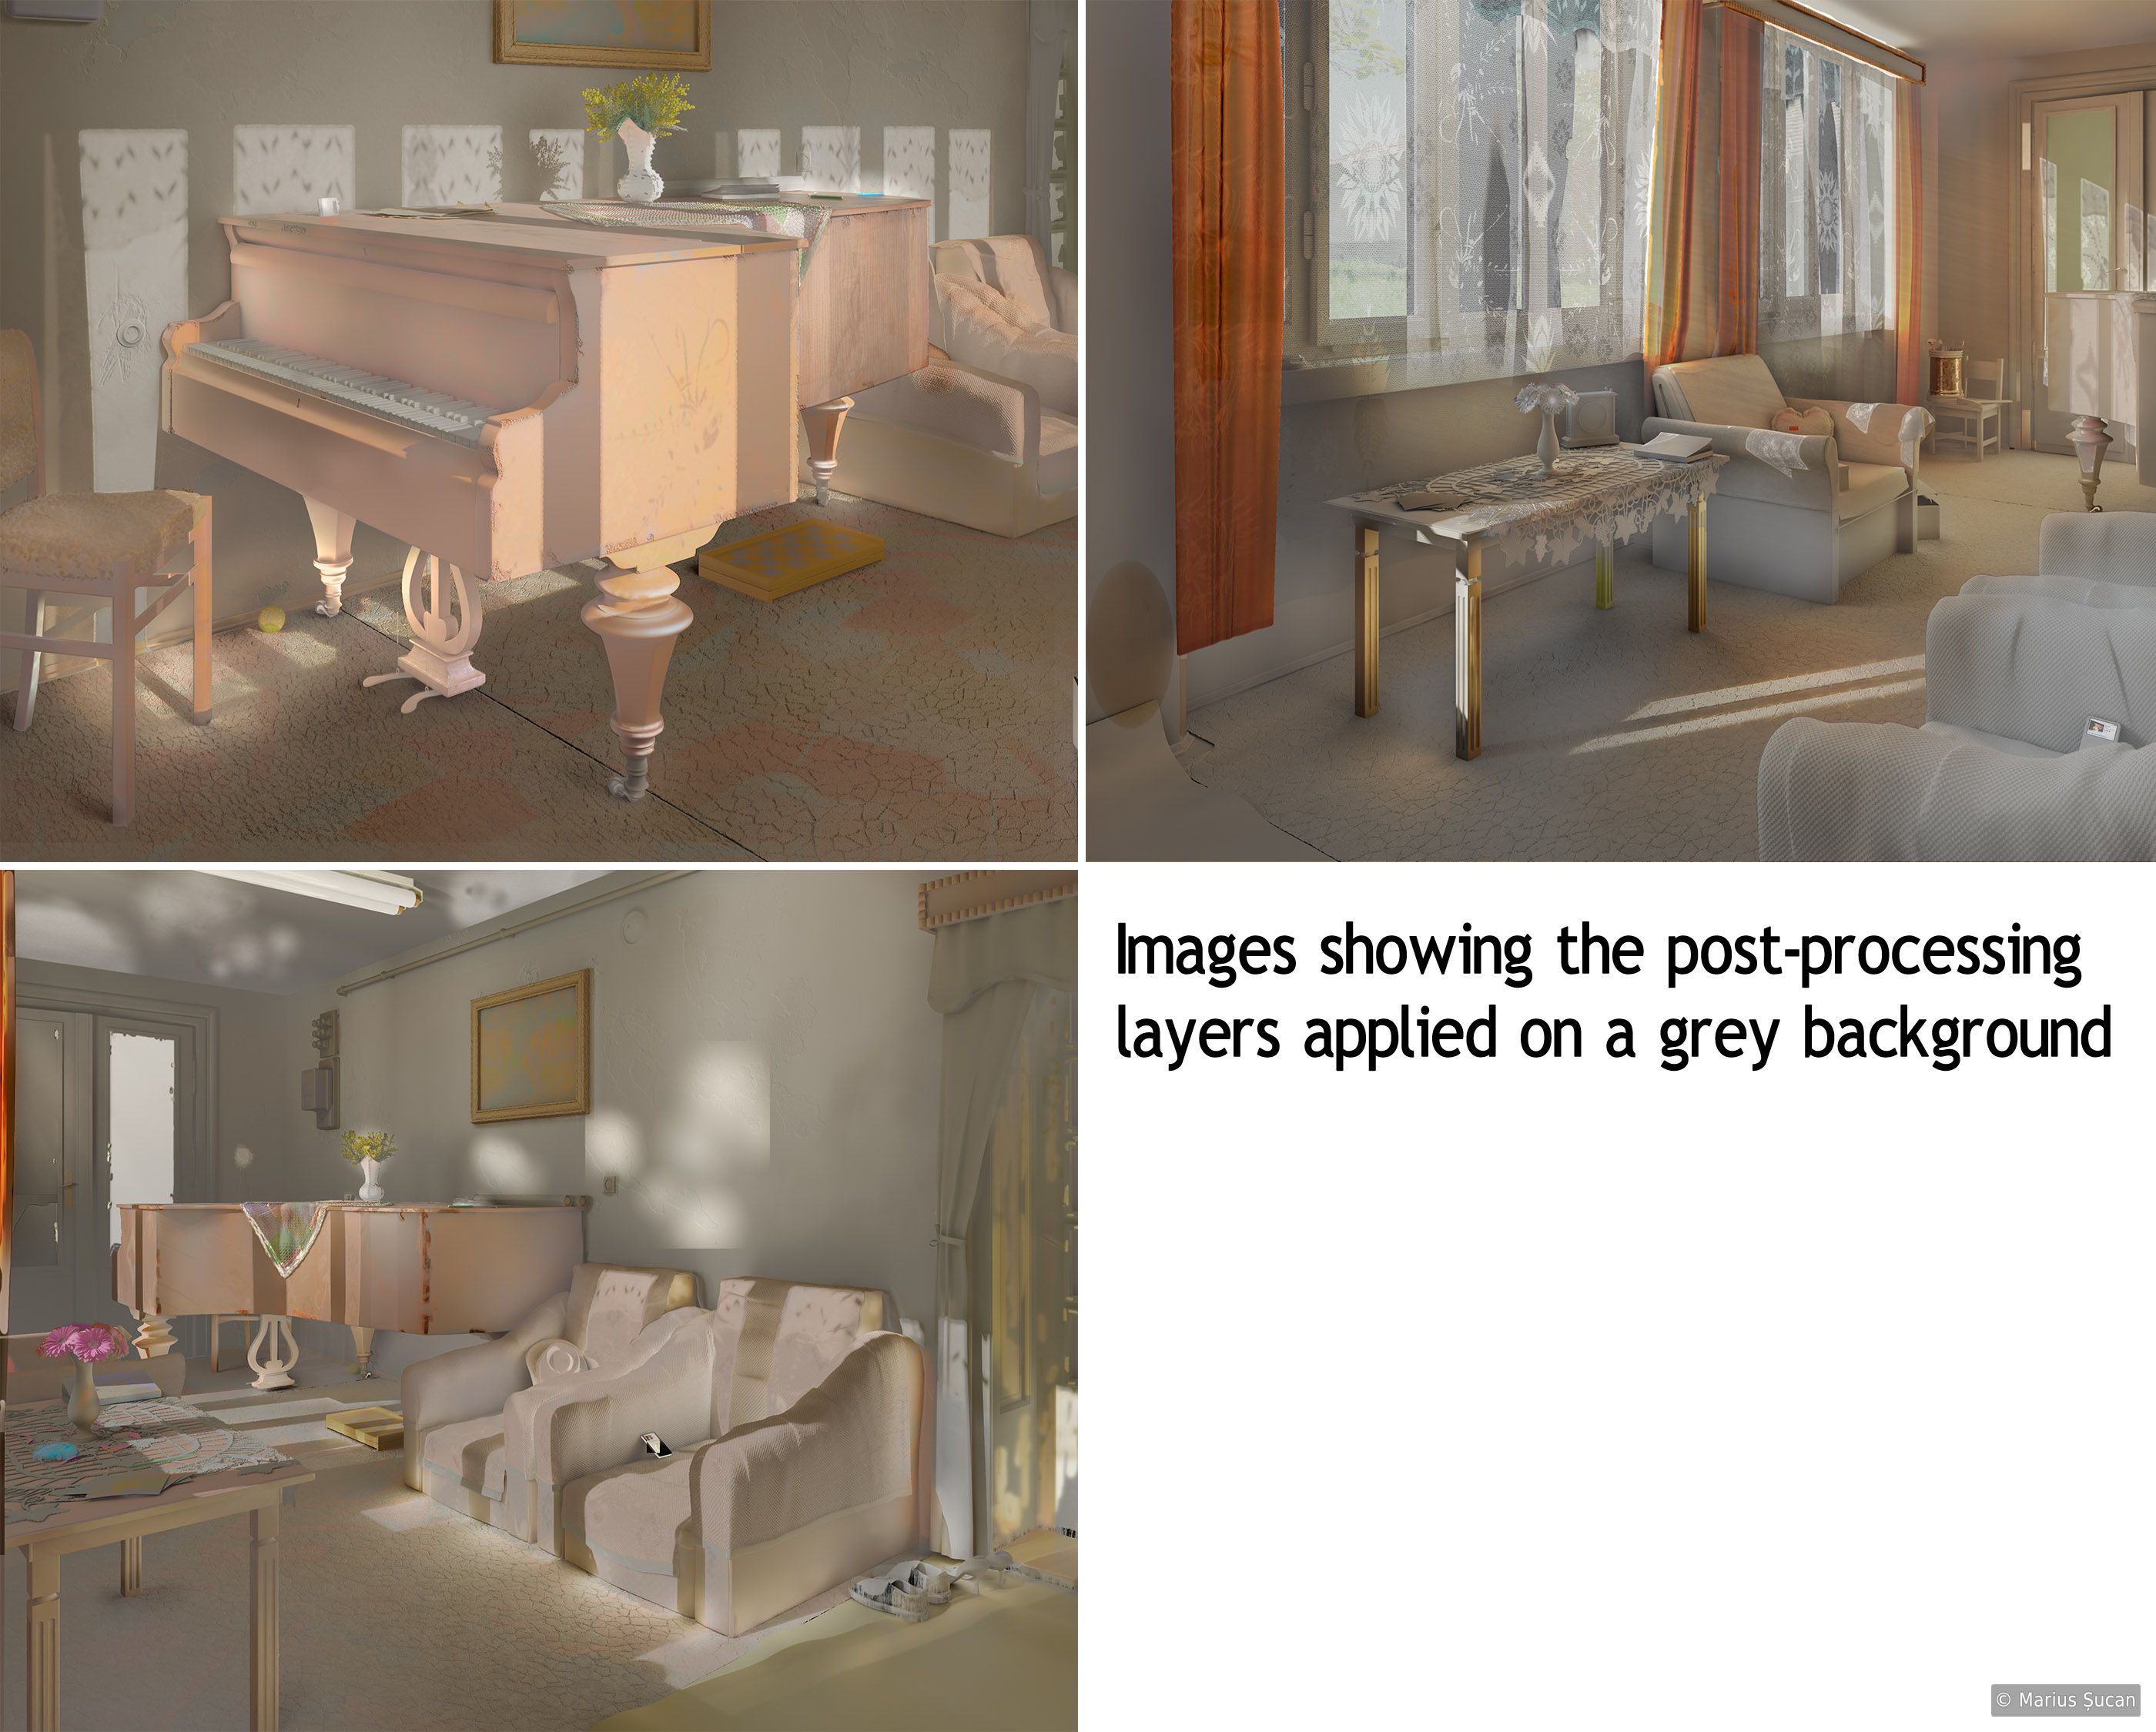
For those more curious, I prepared the following image which shows the multitude of layers used to post-process the renders, applied on a gray background. This allows one to observe the intense work done in regards to the lighting and the shadings of the objects.
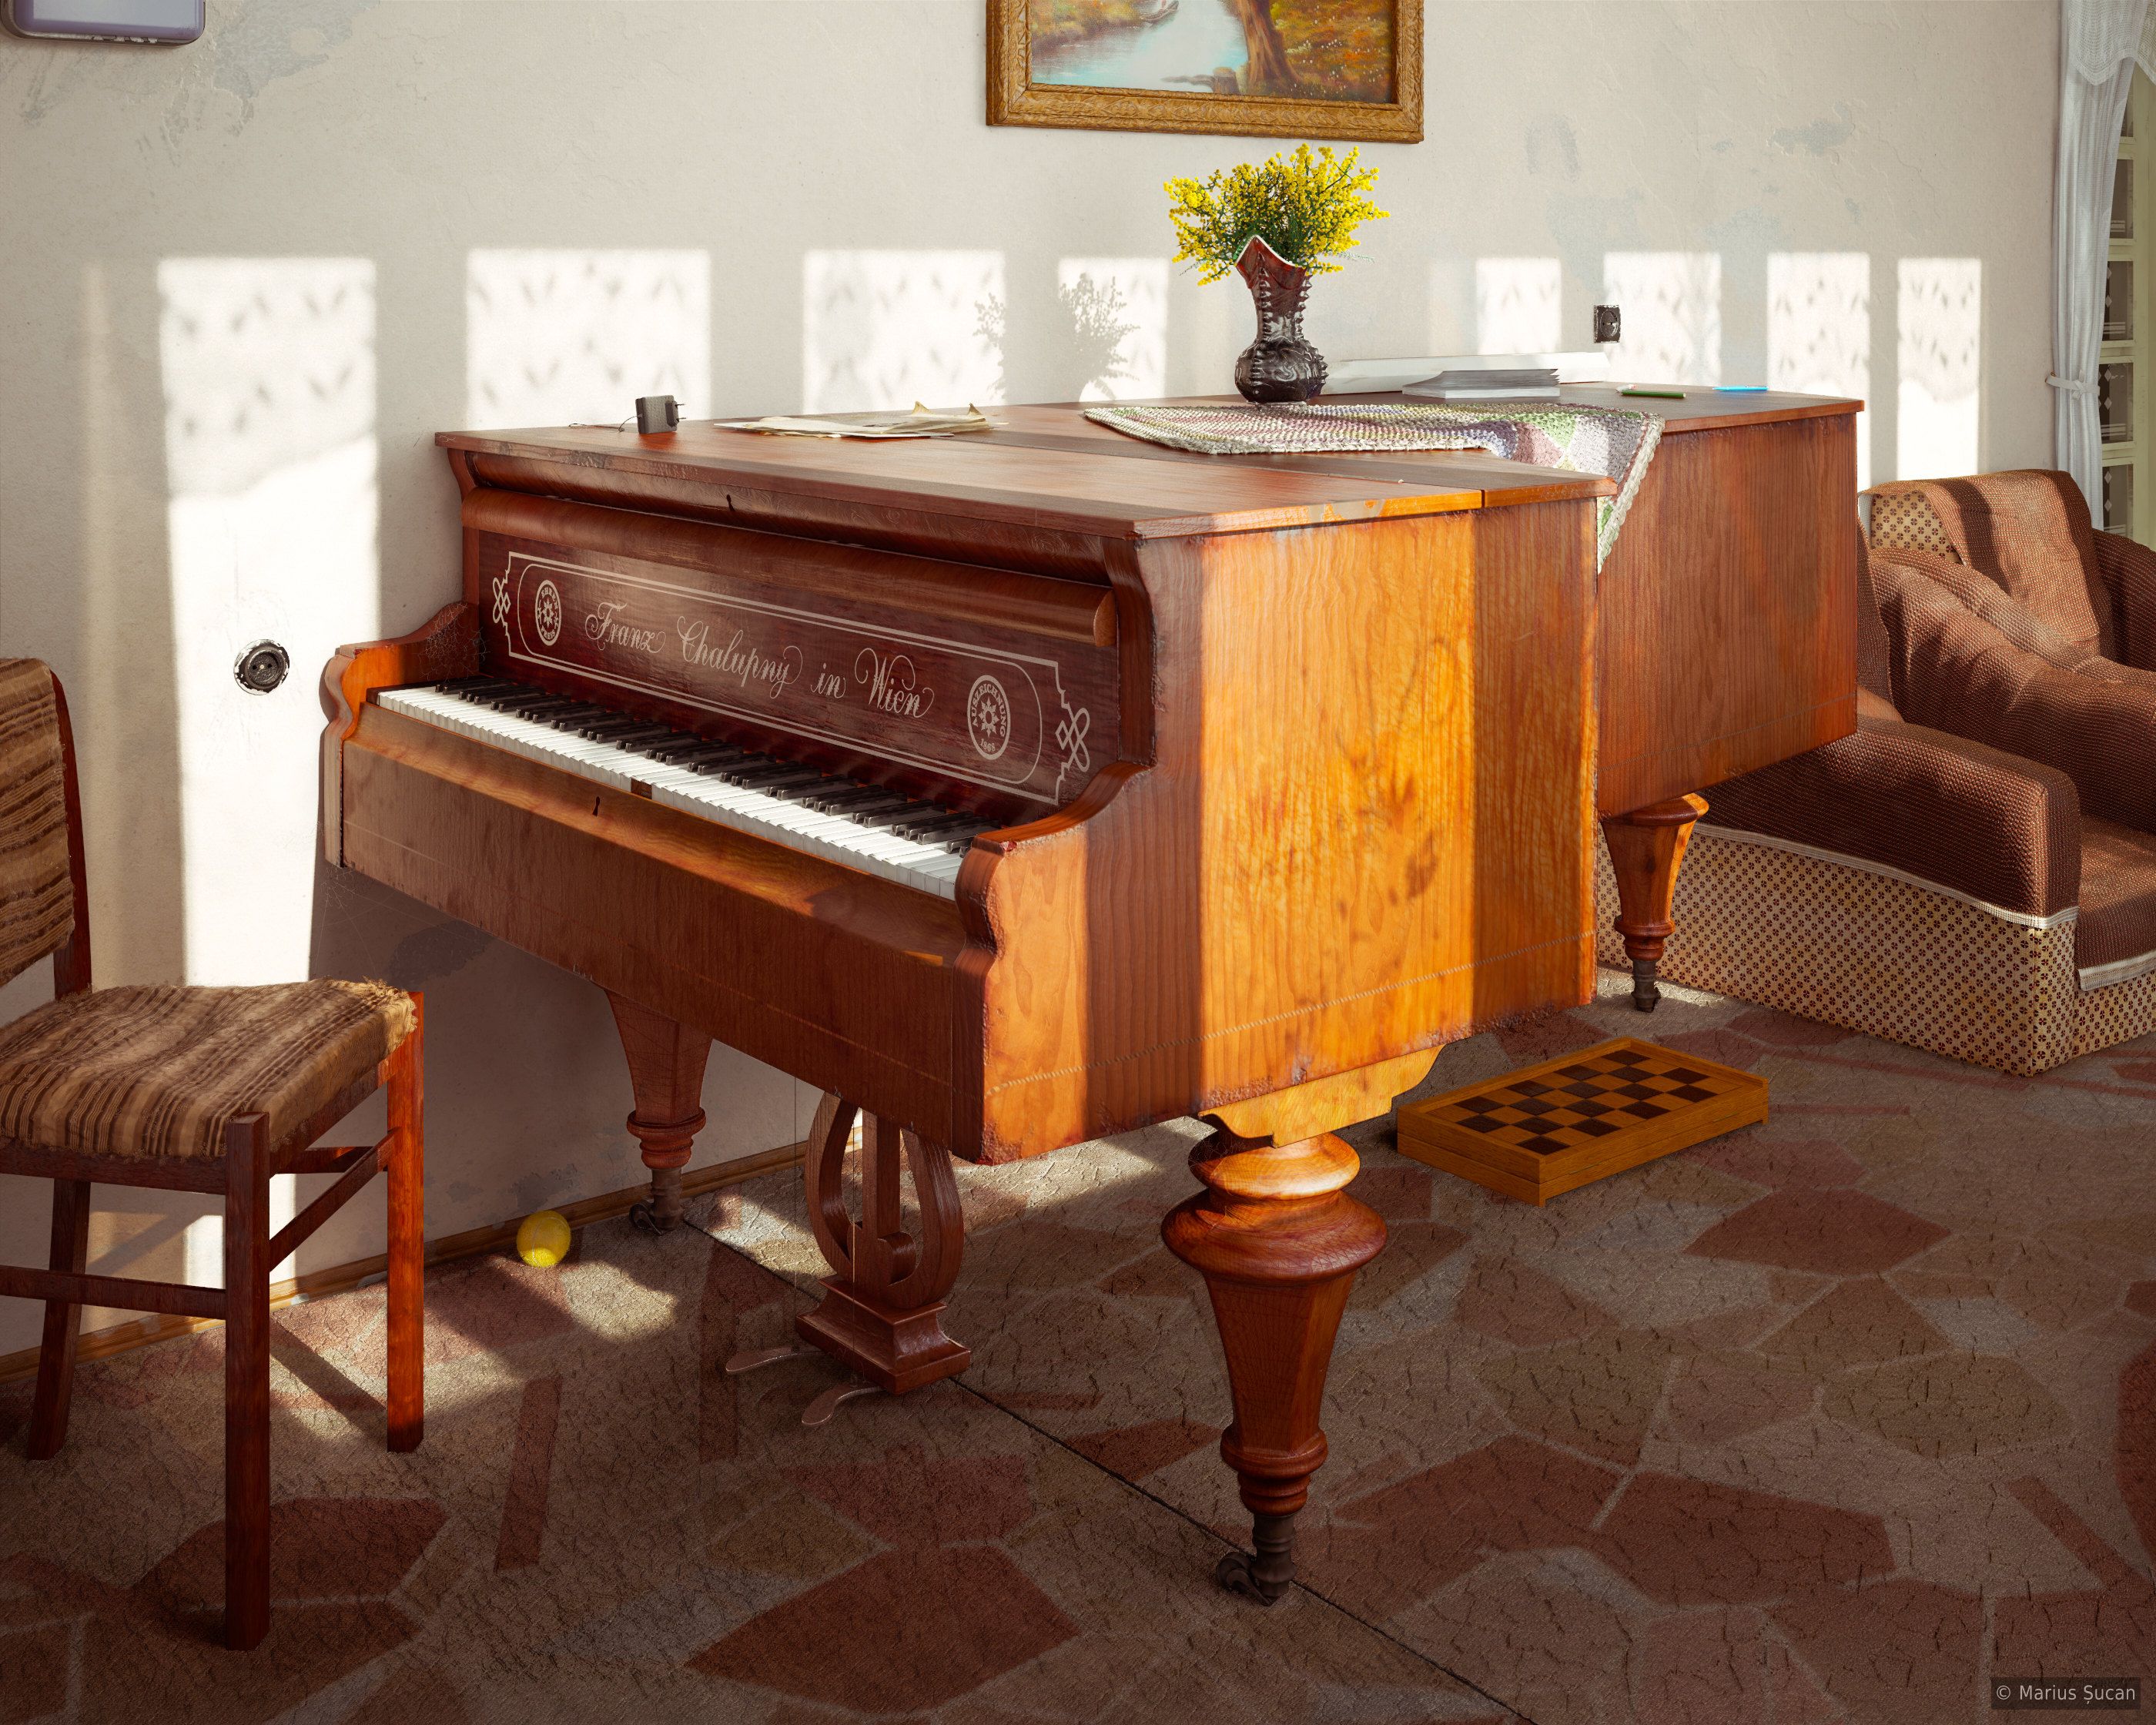
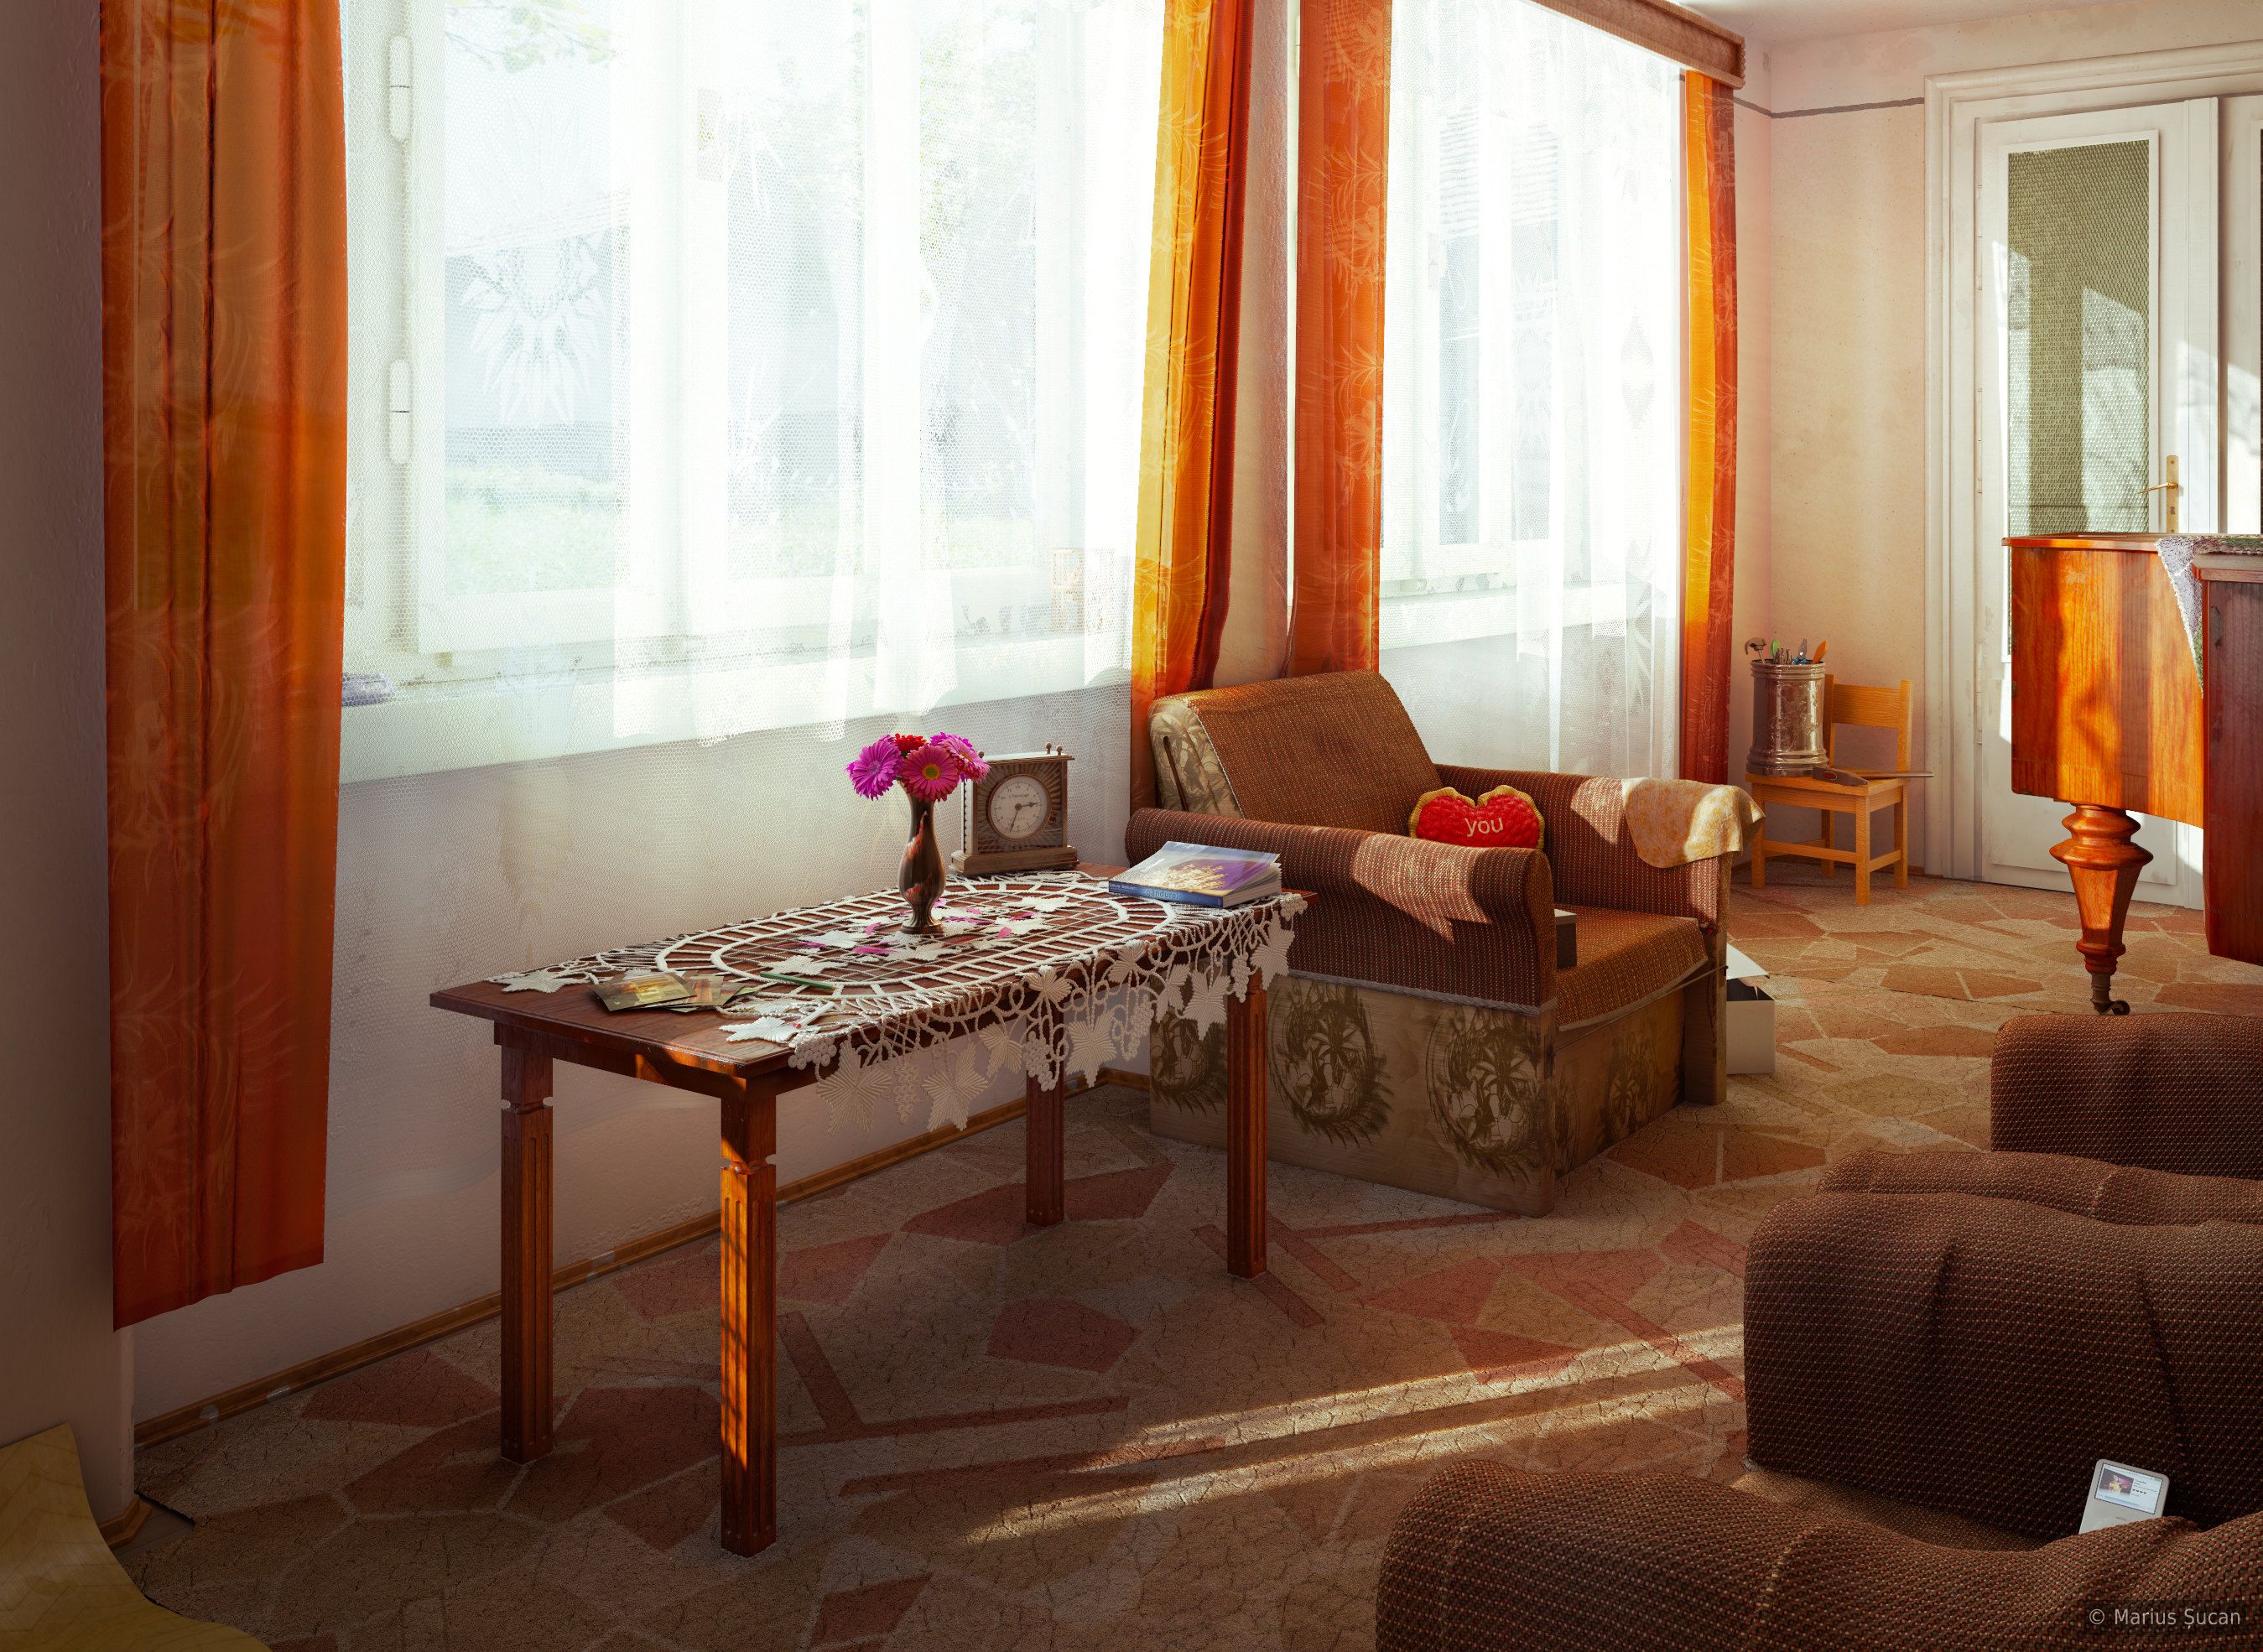
Here are the final renders:
Thank you for your time. Please continue to the next page to see the time-lapse renders.
Next page: Time-lapse renders
Previous page: Rendering